Daring Bakers Challenge : Chocolate covered Marshmallow Cookies

DaringBakers-MarshmallowCookies

(Chocolate Covered Marshmallow Cookies)

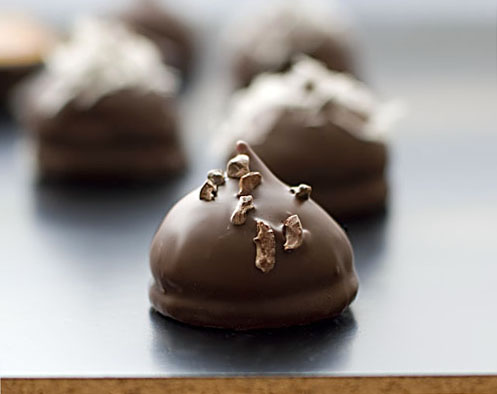
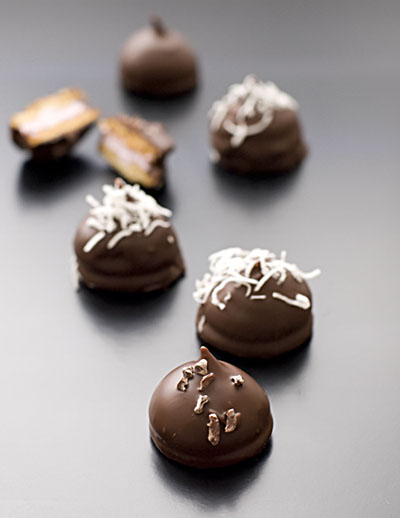
The July Daring Bakers’ challenge was hosted by Nicole at Sweet Tooth. She chose Chocolate Covered Marshmallow Cookies and Milan Cookies from pastry chef Gale Gand of the Food Network.

DaringBakers-MarshmallowCookies2

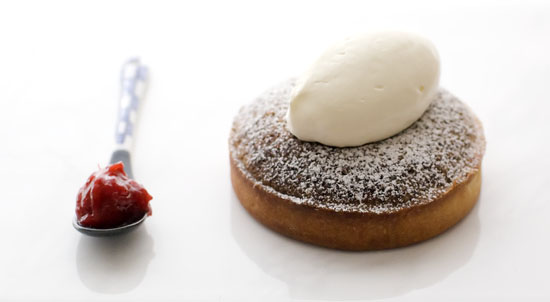
Avert your eyes now if the idea of a supersized chocolate covered marshmallow cookie cake, sounds like too much to digest. To explain, let me start at the very beginning. This month, I somehow managed (once again) to leave the DB challenge until the last minute, so I opted to make just the marshmallow cookies, as they were something I hadn’t tried before.

Of course, my mind tends to wander, so while the cookie dough was chilling, I took a fancy to making Alice Medrich’s peanut butter-chocolate torte. The recipe is easy enough, and gluten-free to boot. However, I didn’t count on the cake cratering as it cooled. Despite the fact it looked wonderfully moist and possibly presentable with a simple dusting of icing sugar, I had a feeling the aesthetic police would not approve.

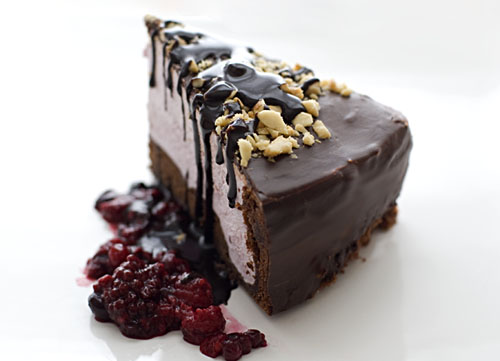
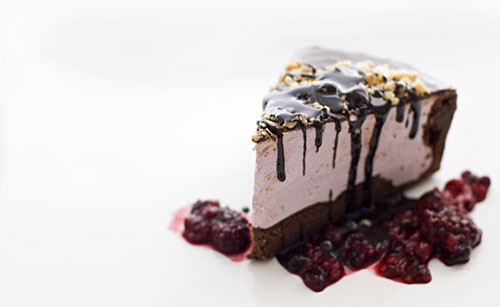
Since I was already in marshmallow-mode, it made perfect sense at the time, to convert the peanut butter torte into a peanut butter and jelly marshmallow torte! I slathered the raspberry flavoured marshmallow I had prepared on top of the torte and after it had set, covered the whole thing in the chocolate glaze recipe. A sprinkling of chopped peanuts for texture, some berry compote and a simple cocoa sauce to finish, and there you have it : my supersized DB challenge.

(Could I get at least one person telling me that it’s not such a crazy idea.. please?)

PeanutButterJellyCake

(Chocolate Covered Peanut Butter & Jelly Marshmallow Cake)

You can get the recipe for the marshmallow cookies from Nicole’s blog.

Peanut Butter-Chocolate Torte :
(serves 12 – 14; recipe from Bittersweet by Alice Medrich)

113g bittersweet chocolate, coarsely chopped
1/2 cup sugar
2 tablespoons natural peanut butter
1/8 teaspoon salt
90g unsalted butter, cut into chunks, slightly softened
4 cold large eggs
1 tablespoon bourbon or other whiskey
1 teaspoon pure vanilla extract

Position a rack in the lower third of the oven and preheat the oven to 175’C. Line the bottom of 8 x 3 inch round springform pan with baking paper.

Place the chocolate in a large heatproof bowl in a wide skillet of barely simmering water and stir occasionally until nearly melted. Remove from the heat and stir until melted and smooth.

Whisk the sugar, peanut butter, and salt into the chocolate. Add the butter and beat with an electric mixer at medium speed until smooth and creamy. Beat in the eggs one by one, followed by the bourbon and vanilla. Continue beating at high speed for 2 to 3 minutes, or until the batter is fluffy, lightened in colour, and the consistency of frosting.

Turn the batter into the prepared pan, spreading it level if necessary. Bake for 25 to 30 minutes, or until a toothpick inserted about 2 inches from the edge comes out clean but one inserted in the center comes out with moist crumbs clinging to it. Set the pan on a rack to cool.

Serving suggestion : Sift icing sugar over the top of the cake and serve each slice with strawberry sauce.

PeanutButterJellyCake2

Comments (62)

Tags: , , , , ,

Daring Bakers Challenge : Bakewell Tart

DaringBakers-BakewellTart

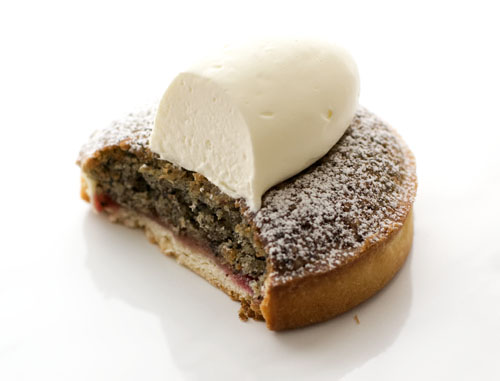
(Rhubarb, hazelnut and black sesame Bakewell tart)

The June Daring Bakers’ challenge was hosted by Jasmine of Confessions of a Cardamom Addict and Annemarie of Ambrosia and Nectar. They chose a Traditional (UK) Bakewell Tart… er… pudding that was inspired by a rich baking history dating back to the 1800’s in England.

The humble Bakewell tart is a simple pleasure. It is easy to bake and is the consummate crowd pleaser. I’m quite fond of frangipane too, especially when it’s freshly baked. Often when I make such tarts, I like to brush a bit of syrup on top of the tart while it’s still warm. It adds a bit of flavour (eg. use an Armagnac syrup, if you’re making a prune frangipane tart) and also ensures that the interior is moist. I also don’t mind saying that it’s nice to get the odd challenge where you have to think of nothing more complicated than what jam it is you’d like for your tart base.

However, time managed to rapidly sift through my hands this month such that the real challenge was trying to find a moment to make the tart. So unfortunately, this turned out to be a bit of a last-minute effort.

DaringBakers-BakewellTart3

My version of the Bakewell Tart for this challenge uses a vanilla rhubarb compote as the jam option, and I have varied the filling to include hazelnut and black sesame flavours, which I prefer to plain almond meal.

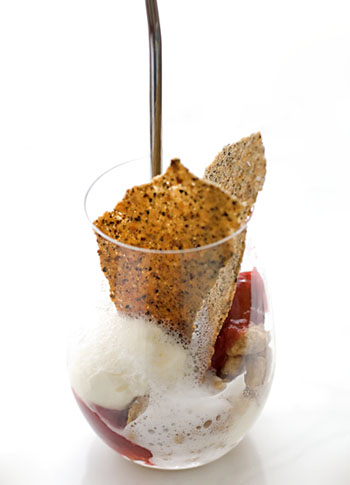
Because frangipane is also extremely delicious as a tuile (spread thinly on a silpat mat and baked until crisp), I decided to throw together a parfait/verrine version of the Bakewell tart, with some toasted almond milk froth to boost the nutty flavour you would get from eating a normal slice of tart.

Many thanks to Jasmine and Annemarie for the tasty challenge!

DaringBakers-BakewellTart2

Sweet shortcrust pastry :

225g plain flour
30g sugar
2.5ml (½ tsp) salt
110g unsalted butter, cold
2 egg yolks
2.5ml (½ tsp) almond extract (optional)
15-30ml (1-2 Tbsp) cold water

Sift together flour, sugar and salt. Grate butter into the flour mixture, using the large hole-side of a box grater. Using your finger tips only, and working very quickly, rub the fat into the flour until the mixture resembles bread crumbs. Set aside.

Lightly beat the egg yolks with the almond extract (if using) and quickly mix into the flour mixture. Keep mixing while dribbling in the water, only adding enough to form a cohesive and slightly sticky dough.

Form the dough into a disc, wrap in cling and refrigerate for at least 30 minutes.

Frangipane :

125g unsalted butter, softened
125g icing sugar
3 eggs
2.5ml (½ tsp) almond extract [I used vanilla instead]
125g ground almonds [I used a combination of hazelnut meal and ground black sesame seeds]
30g all purpose flour

Cream butter and sugar together for about a minute or until the mixture is very fluffy. Scrape down the side of the bowl and add the eggs, one at a time, beating well after each addition. After all three are in, pour in the almond extract and mix for about another 30 seconds and scrape down the sides again. With the beaters on, spoon in the ground nuts and the flour. Mix well. The mixture will be soft, keep its slightly curdled look (mostly from the almonds) and retain its pallid yellow colour.

To assemble, roll out the sweet pastry to line a 23cm tart tin. Trim the excess pastry, chill for 15 minutes, then spread the base with 250ml of jam or curd of your choice. Top with frangipane and bake in an oven preheated to 200’C for 30 minutes. Five minutes before the tart is done, remove it from the oven and top with a handful of flaked almonds, then return to the oven for the last five minutes of baking. When tart is done, remove from the oven and cool before slicing.

Comments (78)

Tags: , , ,

Daring Bakers Challenge : Strudel


(Reinterpreting the strudel, with warm cinnamon apple and vanilla custard)

The May Daring Bakers’ challenge was hosted by Linda of make life sweeter! and Courtney of Coco Cooks. They chose Apple Strudel from the recipe book Kaffeehaus: Exquisite Desserts from the Classic Cafés of Vienna, Budapest and Prague by Rick Rodgers.

I have strange obsessions with certain words, and strudel is one of them. It’s an almost comical word that sounds like it was conceived by a stroppy noodle. Strudel = stroppy noodle = a thin man with a sharp chin, angry skin and raisin eyes. But the word also conjures up romantic images in my mind of sepia-toned cafes in Vienna that I will one day visit. To visit, and have a wedge of sachertorte or apfelstrudel, washed down with delicate porcelain cups of tea. Afterwards, a quick word to the waistcoated waiter for Die Rechnung, bitte, followed by a stroll down snow-covered cobbled streets.

In the lesser rose-tinted corner, strudel also reminds me of the word patience, of which I have none. I recall making strudel pastry several years ago, and watching in dismay as little holes in my pastry bloomed into massive ones. The rips ran just like stockings do, and there was no equivalent little dab of nail polish that was going to solve this problem. The holes were even big enough for a camel to walk through. In fact, not only did a camel walk through one of them, but he even turned back and looked at me disdainfully.
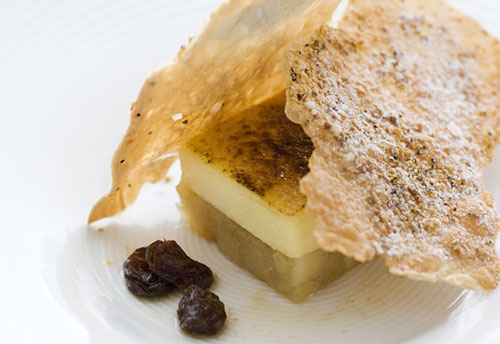
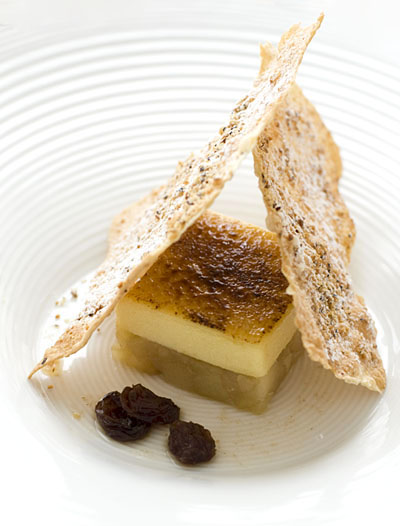
So, I approached this month’s challenge with some apprehensiveness. Fortunately it also occured to me that I could reinterpret the strudel-eating experience to make life easier for myself. The result is an apple compote with a warm caramelised vanilla custard, hidden beneath shards of strudel pastry, and a few rum soaked raisins on the side. I stretched the pastry in small batches, so there was less tearing. The pastry was brushed with butter and dusted with icing sugar, cinnamon, and chopped walnuts, before being baked in the oven until crisp.

The warm vanilla custard recipe comes from Crème Brûlée by Dominique and Cindy Duby. In this unusual recipe, the custard is set with the help of gelatine and agar and is capable of being cut, then heated in the oven until warm, before being bruleed. The overall effect, as the fork comes crashing down on the strudel layer to reveal warm, nutty, spicy, apple and vanilla flavours, mimics the strudel experience. It also tastes just like a normal strudel.
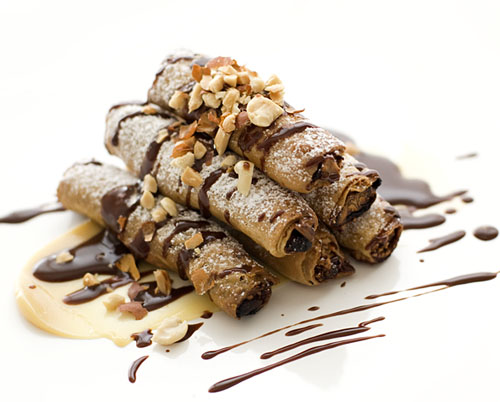

(Mini banana strudels with caramel, chocolate sauce and peanuts)

In case my version of strudel above didn’t count, I also made some mini banana strudels, following Claudia Fleming’s recipe in The Last Course. After stretching the pastry, I divided it into small squares, and proceeded with the recipe given below, forming little banana parcels. Still warm from the oven, these parcels were delicious with caramel and chocolate sauce and a sprinkling of chopped peanuts.

Strudel dough :
(from “Kaffeehaus – Exquisite Desserts from the Classic Cafés of Vienna, Budapest and Prague” by Rick Rodgers)

200 g unbleached flour
1/8 teaspoon salt
105 ml water, plus more if needed
30 ml vegetable oil, plus additional for coating the dough
1/2 teaspoon cider vinegar

1. Combine the flour and salt in a stand-mixer fitted with the paddle attachment. Mix the water, oil and vinegar in a measuring cup. Add the water/oil mixture to the flour with the mixer on low speed. You will get a soft dough. Make sure it is not too dry, add a little more water if necessary.
Take the dough out of the mixer. Change to the dough hook. Put the dough ball back in the mixer. Let the dough knead on medium until you get a soft dough ball with a somewhat rough surface.

2. Take the dough out of the mixer and continue kneading by hand on an unfloured work surface. Knead for about 2 minutes. Pick up the dough and throw it down hard onto your working surface occasionally. Shape the dough into a ball and transfer it to a plate. Oil the top of the dough ball lightly. Cover the ball tightly with plastic wrap. Allow to stand for 30-90 minutes (longer is better).

3. It would be best if you have a work area that you can walk around on all sides like a 36 inch (90 cm) round table or a work surface of 23 x 38 inches (60 x 100 cm). Cover your working area with table cloth, dust it with flour and rub it into the fabric. Put your dough ball in the middle and roll it out as much as you can. Pick the dough up by holding it by an edge. This way the weight of the dough and gravity can help stretching it as it hangs. Using the back of your hands to gently stretch and pull the dough. You can use your forearms to support it.

4. The dough will become too large to hold. Put it on your work surface. Leave the thicker edge of the dough to hang over the edge of the table. Place your hands underneath the dough and stretch and pull the dough thinner using the backs of your hands. Stretch and pull the dough until it’s about 2 feet (60 cm) wide and 3 feet (90 cm) long, it will be tissue-thin by this time. Cut away the thick dough around the edges with scissors. The dough is now ready to be used.

Banana-Pecan Strudels :
(yields 4 servings, from The Last Course by Claudia Fleming)

2 sheets phyllo dough, thawed [I used strudel pastry as made above]
2 tablespoons unsalted butter, melted
4 tablespoons icing sugar [I added some cinnamon to this as well]
4 tablespoons chopped toasted pecans [I used peanuts]
1 medium-ripe banana, sliced lengthwise in quarters
1 tablespoon honey

Preheat the oven to 200’C. Brush 1 phyllo sheet with some of the melted butter. Sift 2 tablespoons of the icing sugar evenly on top. Sprinkle evenly with 2 tablespoons of the nuts. Cut the phyllo sheet in half lengthwise. Place one quarter of the banana along a short edge of each phyllo half. Starting with the short end, tightly roll up the banana in the phyllo. When you get almost to the end, dab a little bit of honey along the edge to help seal the package [Note : This is not necessary when using the freshly made strudel pastry]. Repeat with the remaining ingredients.

Just before baking, brush the tops of the strudels with more of the melted butter and place them seam-side down on a baking sheet (preferably lined with parchment paper or a nonstick liner). Bake until strudels are golden brown, 13 to 15 minutes. Serve immediately.
Comments (89)

Tags: , , , , ,

« Previous Page · Next Page »