Archive for April, 2009

Cookies and memories


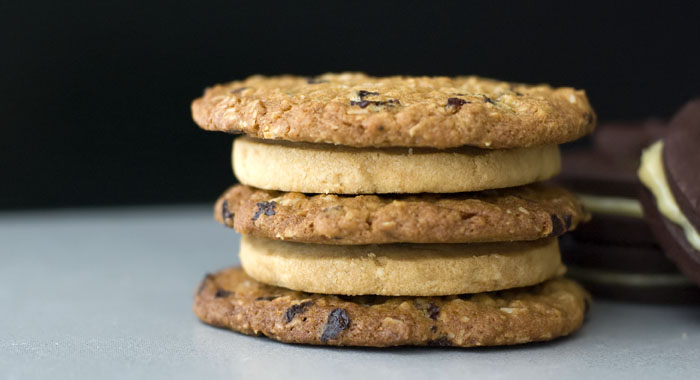
(Tartine’s Lime-Oatmeal-Currant Cookies, Belinda Jeffery’s Salty Peanut Butter Cookies)

The other day, my mother asked me if I would make some cookies for the upcoming visit of my sister and her family. Of course, I said yes straight away.

My sister, if you must know, is the model child in our family. Not only did she graduate from University with an honours degree, but she’s now married, and she had a wedding, which my mother got to organise in its entirety. She also now has two lovely little girls (and because she lives in New Zealand, my mother can play Granny without having to babysit too often). Furthermore, her husband happens to be the son of one of my dad’s childhood friends.

Even though being different personality types meant that we quarrelled a lot as kids (later to be united in our irritation of our much younger brother .. whom I must stress that I also love, just in case he reads this), I am in great debt to her because she was the one who introduced me to all kinds of literature. From Enid Blyton to Ursula K. Le Guin, Neil Gaiman and William Gibson. Also, I still can’t imagine anyone else but my sister, who had no interest in my kind of music whatsoever, acquiescing to chaperone me to some extremely seedy pub in a dodgy location, just so that I could see a band I was obsessed with at the time.

When we were kids, we were rarely allowed to eat any kind of cookie beyond plain Marie biscuits or maybe homemade gingerbread. It was only during each Chinese New Year that there would be the unavoidable abundance of Chinese peanut cookies, love letters and tins of Danish butter cookies that at the time, we considered the ultimate luxury item.

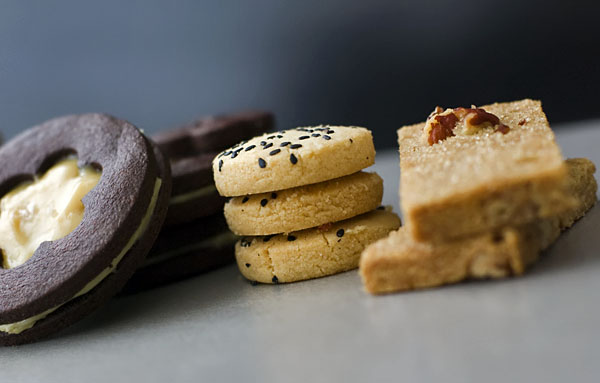
I haven’t baked any cookies in awhile, so I guess I went a little bit overboard. This time, I have attempted a few new recipes, as well as some old favourites, like Alice Medrich’s Sesame Seed Coins. These cookies, which are quite similar in texture to Chinese Peanut Cookies, are incredibly tender and full of sesame flavour. In fact, you can even make them with peanut butter instead of tahini, but I think the original will always be the one I like best.

A good cookie, I believe, is like a celebration. A celebration of good ingredients, encapsulated in a few small bites. It connects me with the cup of tea I drink, the couch I’m slumped on, and the television I’m staring at, or a friend I’m celebrating the return of and the sister I’m looking forward to seeing again.


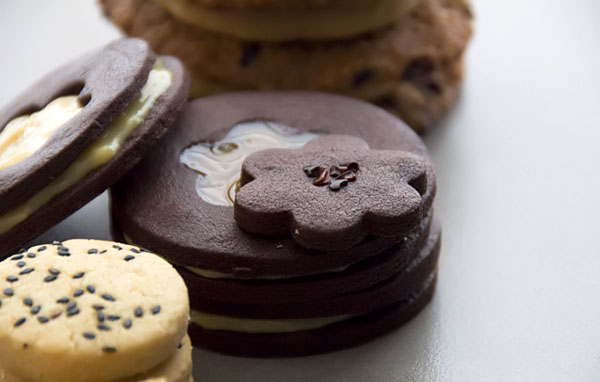
(Chocolate and Caramel Sandwich Cookies with Chestnut Jam)


(Alice Medrich’s Sesame Seed Coins)


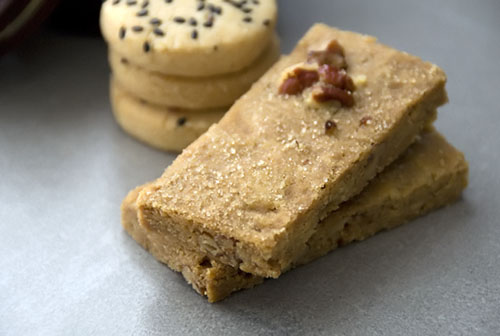
(Alice Medrich’s Pecan Penuche Shortbread)

Pecan Penuche Shortbread with Rum :
(from Alice Medrich’s wonderful book, Pure Dessert)

170g unsalted butter, melted and still warm
99g firmly packed grated piloncillo sugar or light muscovado sugar
1 tablespoon dark rum
1 teaspoon pure vanilla extract
3/8 teaspoon salt
191g plain flour
73g pecans, coarsely chopped
Turbinado, Demerara, or granulated sugar for sprinkling

Line the bottom and four sides of an 8-inch square baking pan with foil. In a medium bowl, combine the melted butter with the sugar, rum, vanilla and salt. Add the flour and half of the pecans and mix just until incorporated. Pat and spread the dough evenly in the pan. Let stand for at least 2 hours, or overnight (no need to refrigerate).

Position a rack in the lower third of the oven and preheat the oven to 148’C.

Sprinkle the remaining pecans over the top of the shortbread and press them gently into the dough. Bake for 45 minutes. Remove the pan from the oven, leaving the oven on. Sprinkle the surface of the shortbread with pinches of the turbinado sugar. Let the shortbread cool for 10 minutes.

Using the foil, remove the shortbread from the pan, being careful to avoid breaking it. Use a thin sharp knife to cut it into squares. Place the pieces slightly apart on a baking sheet lined with parchment and return to the oven for 15 minutes to toast it lightly. Cool on a rack.

Shortbread keeps for several weeks in an airtight container.

Comments (30)

Tags: ,

(Not just) A Chocolate Brownie


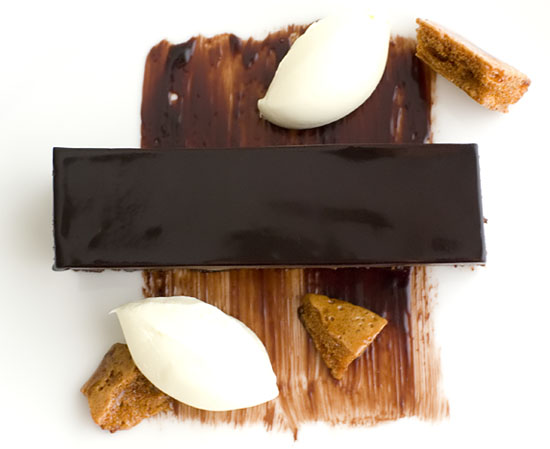
(Chocolate brownie with beetroot honeycomb)

I did a silly thing the other day. A friend came by with the gift of a bag of chestnuts after a recent chestnut picking trip to the Blue Mountains. (How exciting that the season is finally upon us!) I had so many grandiose plans for those shiny little beauties. But first, B showed me how to have a proper old fashioned conker fight. Then, after two chestnuts were suitably destroyed in a highly unskilled contest of extremely random proportions, I set about cooking and painstakingly peeling every single nut left in the bag.

Unfortunately, when it came to cooking a large portion of the peeled chestnuts in order to transform them into a puree, I committed a cooking sin : I walked away from the stove. Yes, not-watching-the-pot-on-the-stove. That ole chestnut!

*sigh*

The pain of losing all those chestnuts (and the frustration of having to scrape a burnt pot) left me in no mood to pursue plan A. We had the remaining chestnuts that evening, in a sauce, with potato gnocchi (a Locatelli recipe). Having shelved my chestnut ideas for dessert, I decided to make something comfortingly chocolate instead.

This chocolate brownie surely scores points for being the ultimate in brownie decadence. A brownie, with a baked layer of chocolate cream reminiscent of chocolate brulee, topped with a shiny chocolate glaze. The original had an additional chocolate decoration on top but since I didn’t have the necessary ingredients for it, I omitted that component.

As this dessert is quite rich, I would recommend halving the recipe and making it in a rectangular baking tin with dimensions roughly similar to 18 x 25 x 4cm. It is pretty complete on it’s own and doesn’t even require the garnishes I have included. Cut the resulting brownie into small fingers and share with all the chocoholics in your life. Especially the ones who bother to bring you bags of chestnuts which you subsequently turn into cinder.

[Update : To anyone making the recommended 1/2 recipe, note that your brownie layer will be thinner than mine because I forgot to reduce the brownie component of the recipe when I made the mix. You can proceed with a full brownie recipe, but a 1/2 recipe will probably make for better eating, because you will get a better chocolate cream : brownie ratio. If you do a 1/2 recipe for the brownie component, make sure you reduce your baking time accordingly.]

Chocolate Brownie :
(serves 10 – 12; from Dessert by David Everitt-Matthias)

for the chocolate brownies :
2 eggs
175g caster sugar
240g bitter chocolate (64% cocoa solids)
150g unsalted butter, melted
seeds from 1 vanilla pod
20g cocoa powder
1/2 teaspoon baking powder
60g plain flour
100g hazelnuts, toasted, skinned and finely chopped [I used macadamias]
100g bitter chocolate (71% cocoa solids), finely chopped

Whisk the eggs and sugar together until thick and pale. Put the 64% chocolate in a large bowl and melt over a pan of simmering water or in a microwave. Stir in the melted butter and vanilla, then fold in the egg mixture. Sift together the cocoa powder, baking powder and flour and fold them in too. Add the nuts and chopped chocolate, then transfer the mixture to a grased and lined 12 x 36 x 4cm baking tray and place in an oven preheated to 180’C. Bake for 20 – 25 minutes, until just cooked but still a little soft in the middle. Remove from the oven and leave to cool while you make the chocolate cream.

for the chocolate cream :
400ml double cream
400ml milk
140g egg yolks (about 4)
100g caster sugar
500g bitter chocolate (71% cocoa solids), chopped

Bring the cream and milk to the boil in a heavy-based saucepan, then remove from the heat. Whisk the egg yolks and sugar together, then pour on the cream, whisking to combine. Return the mixture to the saucepan and cook gently for 2 minutes. Put the chopped chocolate in a bowl and pour on the cream mixture, whisking until the chocolate has dissolved. Pass through a fine sieve. Press the edge of the brownie against the sides of the tin to make sure there aren’t any gaps, then immediately pour on the warm chocolate cream, leaving a 2mm gap at the top of the tin for the glaze. Place the tin in an oven preheated to 150’C and cook for 20 – 25 minutes, keeping your eye on it. The cream should be just set and wobble very slightly in the middle. Remove from the oven, allow to cool for 3 – 4 minutes and then stretch a piece of cling film over the tin; this will allow the cream to finish cooking in its residual heat. When it is completely cold, place in the fridge for 1 hour.

for the chocolate glaze :
150ml water
175g caster sugar
55g cocoa powder
125ml double cream
2 1/3 gelatine leaves
40g bitter chocolate (64% cocoa solids), chopped

Put the water and caster sugar in a saucepan and bring to the boil, stirring to dissolve the sugar. Whisk in the cocoa powder and cream, bring back to the boil, then turn the heat down and simmer for 10 minutes.

Soak the gelatine in cold water for about 5 minutes, until soft and pliable, then squeeze out all the water. Remove the pan from the heat and add the gelatine, stirring until dissolved. Leave to cool for 3 – 4 minutes, then pour on to the chopped chocolate, whisking until it has melted. Pass through a fine sieve and leave to cool.

Remove the brownie from the fridge and spread a layer of the cooled glaze on top, smoothing the surface so it is level with the top of the tin. Return to the fridge to set.

To serve, carefully remove the brownie from the tin and cut it into portions, using a warm, wet knife.

(PS: I forgot to mention in the previous post that I have finally joined Twitter. My one concession to a life otherwise free from Mybook/FaceSpace blah. I’m not sure if I will actually use it much. In fact, I barely know how to use it at this stage, but I thought I would sign up anyway, and see how things go from there).

Comments (59)

Tags: , , ,

Green tea custard scrolls

What is it they say about April showers that seems to apply to Sydney at the moment? We are awash with neverending rain and gloomy skies that make me want to stay rugged up all day, nibbling pastries and sipping tea.

April is usually one of my favourite times of the year, what with the many hot cross buns I have already put away (straight onto my hips). At school, April was the time we exchanged Easter eggs, made plans to meet up during the holidays, and talked endlessly about the showbags we were going to get at the Royal Easter Show. This year is made even more exciting by the impending visit of my sister and her family from New Zealand. It’s been awhile since I last saw my little nieces. We are planning to take them (and B) to their first ever Show, and I expect I’ll be sharing pictures of our day spent there, in the near future.

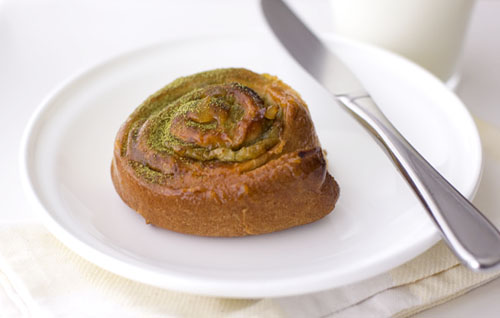
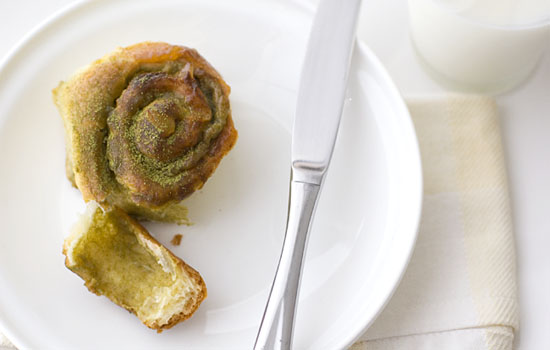
In the meantime, this weather has put me in the mood for a little baking. These brioche scrolls were inspired by a delicious matcha and adzuki bean danish we had at Sadaharu Aoki’s patisserie when we were last in Tokyo. I spread a very generous layer of green tea custard on the brioche dough, scattered some chopped candied ginger and white chocolate on top, then rolled up the dough and portioned it into 12 pieces. These scrolls are incredibly good, straight from the oven, when the custard is still warm and slightly oozy. I had two just while standing there, supervising them as they cooled the rack.

Raquel of Growing Up Green recently passed on an award to me. As thanks, I am dedicating these green tea custard scrolls to her.

Green Tea Custard Scrolls :
(makes 12)

Brioche :
(based on a recipe in Gourmet Traveller Sept 2006)
80ml milk
5g dried yeast
300g plain flour
2 tablespoons caster sugar
1 egg, at room temperature
100g unsalted butter, softened

250 – 300g green tea custard (recipe below)
optional extras : sweetened adzuki beans, chopped candied ginger or white chocolate buttons etc

Warm the milk in a saucepan (to about blood temperature), add the yeast and whisk until yeast dissolves. Stir in 30g flour and stand for 10 minutes or until foamy.

Combine remaining flour, sugar and 1/2 teaspoons sea salt in an electric mixer fitted with a dough hook and mix for 2 minutes on lowest setting. Pour in yeast mixture and egg, mixing until it just comes together [Note: Add a splash more milk if the dough is looking too dry]. Increase speed to medium, add butter a little at a time, then increase speed to high and mix for 5 minutes or until smooth. Transfer dough to a lightly oiled bowl, turn to coat, cover with plastic wrap and stand in a warm place for 1 hour.

Turn brioche dough onto a lightly floured surface, knock back, then knead lightly until smooth. Roll out a 20cm x 55cm rectangle, then, with the long side facing you, spread evenly with green tea custard, leaving a 2cm border on the far long side. Scatter any optional extras you want on top of the custard. Roll into a cylinder, then cut into 12 even pieces and place, cut-side down, closely on a baking paper-lined oven tray and stand for 10 minutes or until risen. Bake at 180’C for 30 minutes or until light golden.

While still warm, brush lightly with a little apricot glaze. When cooled, dust with more green tea powder or icing sugar.

Green tea custard :
(based on a recipe from Pastry : Savory and Sweet by Michel Roux)
[Note: This recipe yields more custard than you need for the scrolls. You can cut the recipe by half, or make the full recipe and use the custard in other ways – as a filling for crepes, for example]
6 yolks
125g sugar
20g plain flour
20g custard powder
500ml milk
1 teaspoon vanilla extract
2 teaspoons green tea (maccha/matcha) powder (or more, if you like it stronger)

In an electric mixer, whisk yolks and a third of the sugar until very thick and pale. Whisk in flour, custard powder and green tea powder.

Heat the milk with the remaining sugar and vanilla. When it boils, pour it onto the egg yolk mixture. Mix well, then return to the stove. Bring to boil, stirring continuously with a whisk. Let it simmer for two minutes, stirring, then strain the custard into a bowl. Place some cling film over the surface of the custard to prevent a skin from forming. Allow to cool completely before using.

(The best way to rapidly chill down the custard is by placing the bowl in an iced water bath. This custard can be made ahead, and kept in the fridge for several days before using.)

Comments (30)

Tags: , ,

« Previous Page