Archive for March, 2013

Of Easter eggs and buns


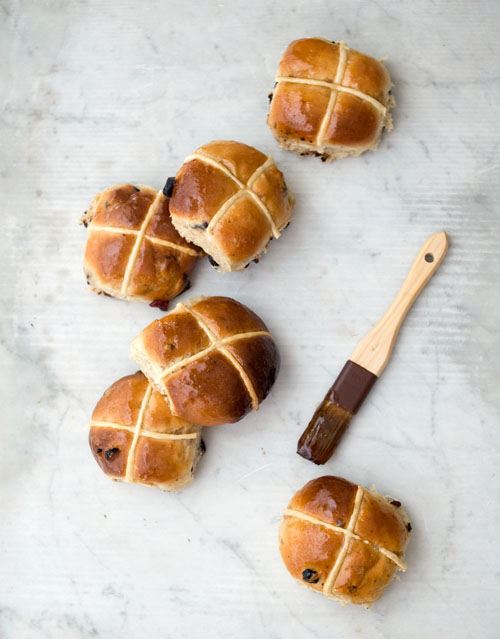
Hot Cross Buns

Every Easter, for quite a few years now, I’ve been trying out different hot cross bun recipes. It’s not something I intentionally set out to do, but all the same has turned into a delicious, much-anticipated annual experiment. One that rarely results in any duds and instead quite often uncovers a few gems.

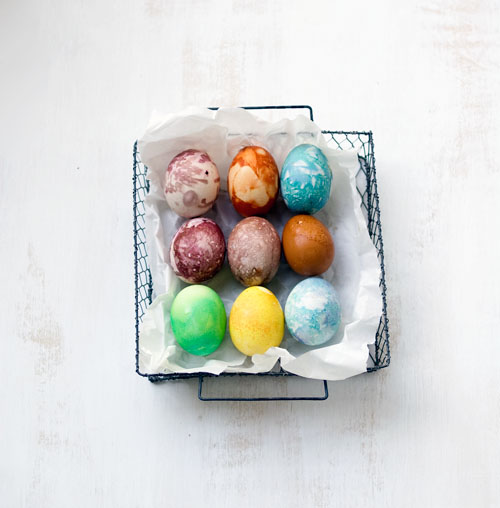
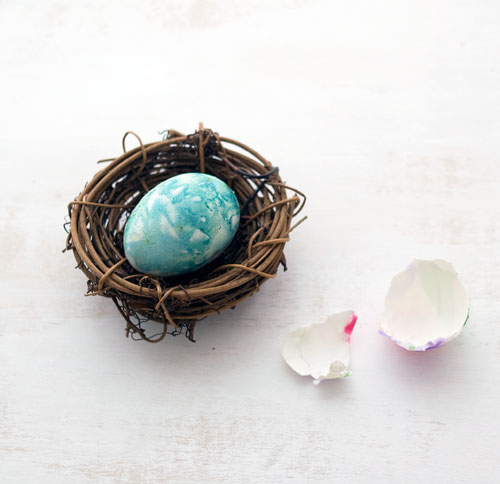
Since I also happen to have the luxury of time this year, I decided to try my hand at decorating Easter eggs. For this, a batch of eggs were dyed with food scraps (pictured above) and the remainder were covered with patterns using a neat trick as seen here.

Of the two techniques, using food scraps to obtain natural dyes was the most interesting, especially for a big kid like myself. The eggs were boiled until just cooked, cooled, then left to soak for several hours in jars of various dyes. The unpredictable nature in which the colour would form and be absorbed into the shell meant that the pattern on every egg you scooped out of the dye bath, was always a surprise. So far the best colours have been extracted from the use of boiled onion skins (orange brown), red cabbage leaves (shades of blue and purple) and turmeric (bright yellow).

Once you’re done admiring them though, you’re then left with the task of eating eggs for the remainder of the week – an idea rendered somewhat more palatable by having started with good quality, organic, free-range eggs, and the fact that the eggs weren’t boiled to the point of dry and greying yolks. We had yellow tinted eggs with a noodle salad for dinner last night. Very delicious.

But back to the buns. This year I’ve tried a recipe using an Asian bread baking method that incorporates a water roux also known as Tangzhong, into the dough. The roux supposedly helps retain moisture in the dough, resulting in a fluffy baked product that also doesn’t dry out as quickly. Two dozen very consistent, great tasting batches later and I think this just might be the recipe that puts an end to my hot cross bun baking experiments for good.

Of course, if there was some way to logically incorporate boiled eggs and baked buns into more of our meals, you’d probably find me still experimenting for many years to come.

Hot Cross Buns :
(makes 12; slightly adapted from this recipe)

For the water roux :
25g flour
125g water

For the dough :
350g flour
35g sugar
5g salt
1 egg
125g milk
1 sachet dried yeast
30g soft unsalted butter
100g raisins
20g chopped dark chocolate
1/2 teaspoon ground cinnamon
1/4 teaspoon ground allspice

To decorate : flour paste for crosses and a glaze of your choice (Here I’ve used an Earl Grey tea jelly. Alternatives include : warmed apricot jam, lemon or vanilla-flavoured sugar syrup or a reduced malt/maple syrup)

First make the roux. Whisk the flour and water together in a small pan over medium heat. Cook, whisking at all times, until the mixture thickens. If you’re unsure as to what this is supposed to look like, you can also test the temperature of the thickened mix. It should have reached 65’C. Once it has thickened, scrape the roux into the bowl of your mixer (it should weigh 120g). Place some cling film over the surface of the roux and allow it to cool to room temperature.

When the roux has cooled down, add the egg, milk and sugar to the bowl, followed by the yeast, flour, salt and spices. With the dough hook attached, start mixing the dough until it comes together and looks smooth, about 2 minutes. Add the butter and continue mixing on medium speed for another 2-3 minutes. Mix in the dried fruit and chopped chocolate, then cover the bowl and leave the dough to prove for an hour or until doubled.

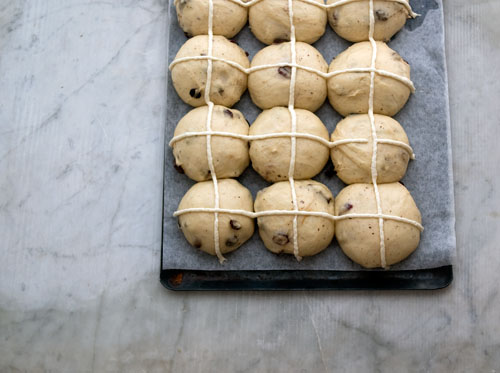
Once doubled, divide the dough into 12 pieces (12 x 65g). Roll into balls and arrange them roughly 1.5 inches apart on a lined tray. Cover lightly with greased cling film and allow to prove again for another hour. Meanwhile, make your flour paste (see note below), place it into a piping bag and set aside.

Once the buns have proved, pipe the crosses on the buns and bake them in a preheated 190’C oven for 14 minutes. When they are ready, they should be golden brown and sound hollow when tapped. Remove them from the oven and brush with a glaze of your choice while they are still warm.

[Note : Make a flour paste by mixing 8 tablespoons of flour to roughly 4 tablespoons of water to achieve a pipe-able paste. This is for the crosses on the buns, and is more than you will need, because I find it easier to pipe the crosses evenly when there is a decent amount of mixture in the bag. If you think flour paste crosses taste horrible, you can leave them out and instead pipe a sugar or white chocolate cross on each bun once they are cooled]/strong

Comments (10)

Tags: , , , ,

Postcard from Autumn


(Simple apple tart)

A postcard from Autumn in Sydney would read something a little like this : Bringing you sunshine filled days and cool, breezy evenings. Enjoy. PS: Don’t forget to make apple tart!

This month, I’ve been busy eating as many of Summer’s last yellow nectarines as possible, while in the kitchen, I’m already dreaming of apple pie and hot stews. It’s no coincidence that we’ve already had two apple-based pastries since the start of March. Nothing spells comfort to me more.

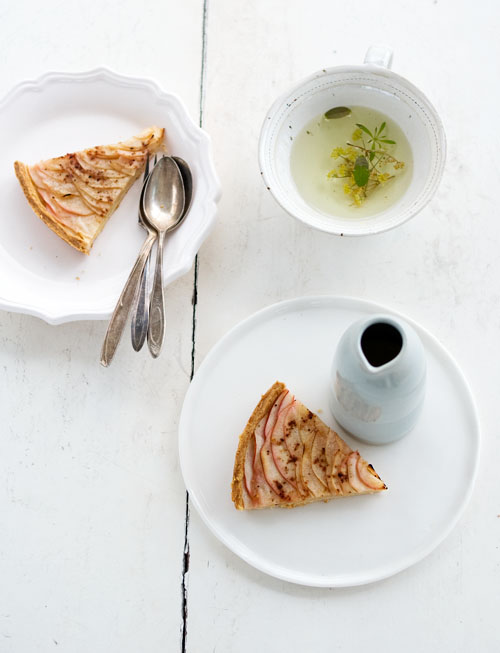
Inspired by Autumn’s note, and a wedge of flaky pastry I dug out from the freezer, a very simple apple tart was made. Not overly sweet and not too dissimilar to the French tarte fine aux pommes, it was delicious served with a little puddle of vanilla custard. There are many things you could add to this tart to make it a bit more fancy. Brush a cider glaze over the finished product, or wave a blow torch over the surface as it emerges from the oven. Heck you could even make it with a combination of apples and persimmons (another great Autumn fruit). But you could also just as easily keep it simple, because sometimes, simple is best.

Simple Apple Tart :

250g flaky pastry (a recipe is provided below, if you need one)
2 apples
juice of 1/2 lemon
2 tablespoons sugar (or vanilla sugar)
1/2 teaspoon cinnamon

Slice the cored but unpeeled apples as thinly as possible (use a mandoline if you have one). Toss in the lemon juice and set aside while you roll the pastry.

On a lightly floured counter top, roll out the pastry to 1/8-inch thick and line a 9-inch shallow pie tin, trimming off any excess pastry. (You can use the offcuts to make pie cookies!) Drain off the lemon juice and arrange the apple slices on top of the pastry in a concentric pattern, like so. Combine the sugar with the cinnamon and sprinkle on top of the apple slices. Bake in a preheated 190’C oven for 25-30 minutes. Serve with custard or ice-cream.

[NB : For the flaky pastry : In a food processor, blitz 140g plain flour with a generous pinch of salt, 1 tablespoon sugar and 120g butter, until the mixture resembles breadcrumbs. Add 1 yolk and 1-2 tablespoons of iced water and blitz again until the dough just comes together. Wrap and chill the dough for a few hours before using.] (Simple apple tart)

Comments (10)

Tags: , ,

Chocolate Krantz Cake


(Burnt chocolate and caramel custard with mini chocolate Krantz cake)

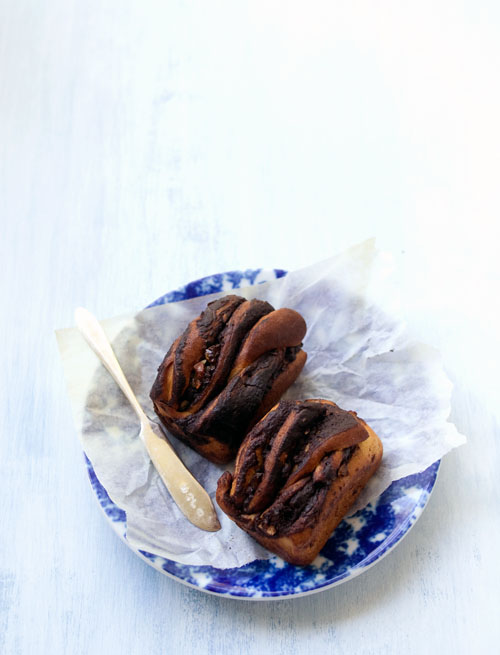
Every once in awhile, an exceptional recipe comes along and fairly quickly without much thought, I find myself returning to it more than twice in a single week. This very splendid chocolate Krantz cake from Tara’s blog, which comes by way of Ottolenghi, is one such recipe. It produces two memorable loaves of sweet yeasted cake that are utterly blissful when eaten warm and that also manage to stay moist and just as pleasing several days later.

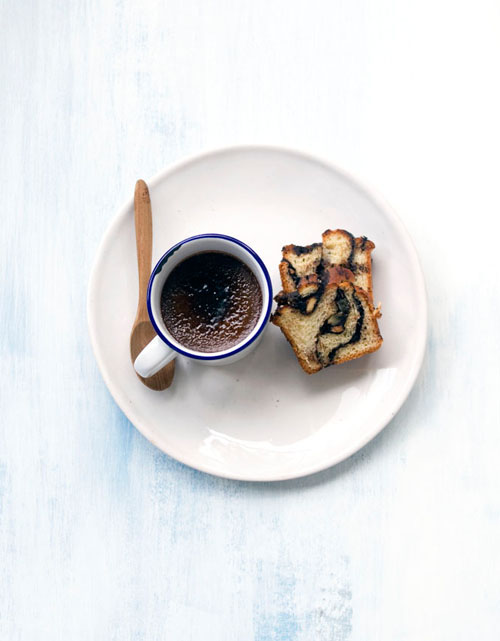
The first time I made it, I foolishly halved the recipe. Big mistake. The entire loaf disappeared within two days, leaving me craving for more. The second time round, I made a full batch, flavouring the dough with candied orange and cardamom and also reducing the sugar content by a few tablespoons. Half the dough was converted into a tray of mini loaves, for tearing and dipping into little cups of burnt chocolate custard.

Anyway, you know the drill. If you only have time and the inclination to bake one thing this week, please let it be chocolate Krantz cake. Get the recipe from Tara’s blog. If you want to gild the lily, the recipe for the chocolate custards are below.

Burnt chocolate caramel custards :
(makes 4; adapted from a recipe from The Sweet Life by Kate Zuckerman)

1/2 cup caster sugar
1 cup cream, warmed
1/2 cup milk
1 teaspoon vanilla extract
70g bittersweet chocolate, melted
3 egg yolks
generous pinch of sea salt

plus extra caster sugar for caramelising the finished product

Melt the 1/2 cup of sugar in a medium sized pot, then increase the heat and cook until golden brown, stirring with a heat-proof spatula. When the sugar has caramelised, turn down the heat and carefully whisk in the cream (the caramel will splutter), followed by the milk and salt. Continue cooking until the caramel has dissolved, then remove from the heat.

In a large bowl, combine the yolks with the melted chocolate, then whisk in the warm caramel cream. Strain the custard into a jug, and divide the mixture between 4 ramekins (I used small cups, as shown in the first picture). Bake covered loosely with foil in a bain marie in a preheated 155’C oven for about 40 minutes until the custards are just set. Chill overnight before caramelising with a generous sprinkle of caster sugar and a blow torch.

Comments (6)

Tags: , , , , , ,

Next Page »