Daring Bakers Challenge : Pizza

I did a silly thing. I knew we were going to make pizza for the Daring Bakers Challenge this month, but didn’t read through the recipe until the last minute. So it was on the very last day of having time to spend in the kitchen, that I realised the recipe actually required a day’s worth of preparation and resting prior to baking!

*slaps forehead*

Still, I didn’t want to let such a minor detail deter me from attempting the challenge. So where it stated that the dough should rest overnight, I allowed it a good 4 or so hours sleep in the chiller before waking it up again. I figured, heck, if I often have to cope with that little sleep during my working week, then a pizza dough should be able to perform reasonably well too. Inbetween, I also made a basic tomato sauce for the pizza base.

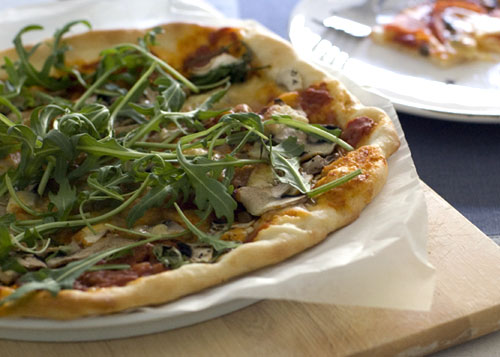
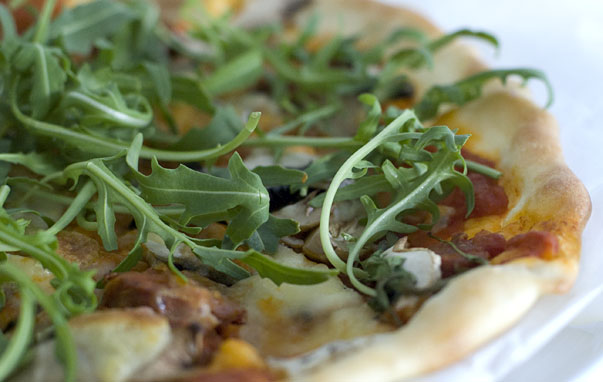
Turns out, the dough was every bit the survivor as I had hoped, and that evening, B and I sat down to a very satisfying dinner consisting of two different flavoured pizzas – a Margarita style pizza with tomatoes, bocconcini and basil, and a mushroom one. We even got into the spirit of things and watched an episode of The Sopranos.

In case you’re wondering about the tossing of the dough, I must confess I’ve never been much of a tosser (!) so, sorry, no photos there! Also, I’m sure a lot of fellow Daring Bakers opted to transform half their doughs into sweet versions, but I seem to have a mental block about dessert pizzas, and steered well away from that. The savoury versions were tasty enough, with plenty left over for another meal the next day, so I have no regrets about that decision! 😀

Thank you Rosa, for picking pizza as this month’s challenge, in memory of Sher. This recipe is now the pizza dough recipe to beat, in my kitchen! In fact, I’m hoping to make it again (the proper way) soon.

Basic Pizza Dough :
(makes 6 pizza crusts (about 9-12 inches/23-30 cm in diameter, from The Bread Baker’s Apprentice by Peter Reinhart).

607.5 g unbleached high-gluten bread flour or all purpose flour, chilled
1 3/4 tsp salt
1 teaspoon instant yeast
60g olive oil or vegetable oil
420g water, ice cold (4.5° C)
1 tablespoon sugar
Semolina/durum flour or cornmeal for dusting

DAY ONE

1. Mix together the flour, salt and instant yeast in a big bowl.

2. Add the oil, sugar and cold water and mix well in order to form a sticky ball of dough. On a clean surface, knead for about 5-7 minutes, until the dough is smooth and the ingredients are homogeneously distributed. If it is too wet, add a little flour (not too much, though) and if it is too dry add 1 or 2 teaspoons extra water.

3. Flour a work surface or counter. Line a jelly pan with baking paper. Lightly oil the paper.

4. With the help of a metal or plastic dough scraper, cut the dough into 6 equal pieces.

5. Sprinkle some flour over the dough. Make sure your hands are dry and then flour them. Gently round each piece into a ball.

6. Transfer the dough balls to the lined jelly pan and mist them generously with spray oil. Slip the pan into plastic bag or enclose in plastic food wrap.

7.Put the pan into the refrigerator and let the dough rest overnight or for up to thee days.

DAY TWO

8. On the day you plan to eat pizza, exactly 2 hours before you make it, remove the desired number of dough balls from the refrigerator. Dust the counter with flour and spray lightly with oil. Place the dough balls on a floured surface and sprinkle them with flour. Dust your hands with flour and delicately press the dough into disks about 1.3 cm thick and 12.7 cm in diameter. Sprinkle with flour and mist with oil. Loosely cover the dough rounds with plastic wrap and then allow to rest for 2 hours.

9. At least 45 minutes before making the pizza, place a baking stone on the lower third of the oven. Preheat the oven as hot as possible (260° C).

10. Generously sprinkle the back of a jelly pan with semolina/durum flour or cornmeal. Flour your hands. Take 1 piece of dough by lifting it with a pastry scraper. Lay the dough across your fists in a very delicate way and carefully stretch it by bouncing it in a circular motion on your hands, and by giving it a little stretch with each bounce. Once the dough has expanded outward, move to a full toss.

11. When the dough has the shape you want (23-30 cm in diameter – for a 180g piece of dough), place it on the back of the jelly pan, making sure there is enough semolina/durum flour or cornmeal to allow it to slide and not stick to the pan.

12. Lightly top it with sweet or savory toppings of your choice.

13. Slide the garnished pizza onto the stone in the oven or bake directly on the jelly pan. Close the door and bake for abour 5-8 minutes.

NOTE: After 2 minutes baking, take a peek. For an even baking, rotate 180°.

14. Take the pizza out of the oven and transfer it to a cutting board or your plate. In order to allow the cheese to set a little, wait 3-5 minutes before slicing or serving.

Comments (60)

Tags: ,

Daring Bakers Challenge : Lavash Crackers

For this month’s DB Challenge, and as a first ever for the DB group, Natalie and Shellyfish challenged us to make lavash crackers and an accompanying dip, whilst keeping within the perimeters of being gluten-free (optional) and vegan.

Lavash crackers are relatively easy to make and have fairly wide appeal so I was thrilled that the hosts had opted for this. What worried me was my choice of accompaniment. While I have dabbled with being vegetarian and pescatarian in the past, I’ve never ever considered going vegan and therefore wasn’t too familiar with it. In fact, my favourite thing to have with lavash crackers is a decent piece of cheese, be it a gloriously creamy triple cream cheese like St. Andre, or even a fabulous Australian-made goats cheese.

Dip. Chip ‘n’ Dip. A friend said he attended a party recently and spied a hollowed out round loaf of bread, filled with dip with the bready innards served on the side as agents for the dip! Somehow, that reminded me so much of the seventies and eighties. Growing up, we were never really “dip” people (aside from our brown and orange lounge furniture, and pastel green walls, a few trends did manage to bypass my mother during those decades). Mom made a mean ricotta cheese dip at one stage but we all got tired of it pretty quickly and it hasn’t been seen or heard from since.

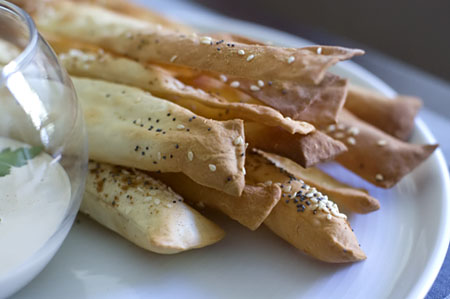
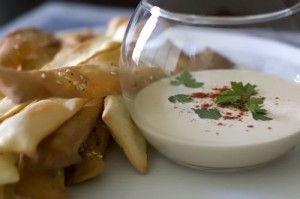
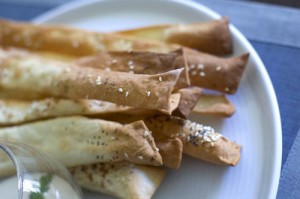
So I was stumped for ideas (aside from guacamole and tomato salsa) until I came across a recipe for a tahini sauce in the latest issue of Vogue EAT. The sauce was intended as an accompaniment to a dish of tameya, or falafel, but I had tasted a similar sauce before and figured it would also work well as a dip. In keeping with this Middle Eastern-ish theme, I used sesame seeds, poppyseeds and a sprinkling of ras el hanout on my crackers. The crackers tasted lovely and were fun to watch, puffing up in the oven.

Below, I have provided the recipe for the non gluten-free version of the lavash cracker. If you are after the gluten-free one, or are just interested in ideas for vegan dips and spreads, you should check out the other DB blogs.

Lavash Crackers :
(the non-gluten-free version; recipe reference: The Bread Baker’s Apprentice: Mastering The Art of Extraordinary Bread, by Peter Reinhart.)

* 1 1/2 cups unbleached bread flour
* 1/2 tsp salt
* 1/2 tsp instant yeast
* 1 Tb agave syrup or sugar
* 1 Tb vegetable oil
* 1/3 to 1/2 cup + 2 Tb water, at room temperature
* Poppy seeds, sesame seeds, paprika, cumin seeds, caraway seeds, or kosher salt for toppings

1. In a mixing bowl, stir together the flour, salt, yeast, agave, oil, and just enough water to bring everything together into a ball.

2. Sprinkle some flour on the counter and transfer the dough to the counter. Knead for about 10 minutes, or until the ingredients are evenly distributed. The dough should pass the windowpane test and register 25-27’C. The dough should be satiny to the touch, not tacky, and supple enough to stretch when pulled. Lightly oil a bowl and transfer the dough to the bowl, rolling it around to coat it with oil. Cover the bowl with plastic wrap.

3. Ferment at room temperature for 90 minutes, or until the dough doubles in size.

4. Mist the counter lightly with spray oil and transfer the dough to the counter. Press the dough into a square with your hand and dust the top of the dough lightly with flour. Roll it out with a rolling pin into a paper thin sheet about 15 inches by 12 inches. You may have to stop from time to time so that the gluten can relax. Cover it with a towel or plastic wrap while it relaxes. When it is the desired thinness, let the dough relax for 5 minutes. Line a sheet pan with baking parchment. Carefully lift the sheet of dough and lay it on the parchment. If it overlaps the edge of the pan, snip off the excess with scissors.

5. Preheat the oven to 176’C with the oven rack on the middle shelf. Mist the top of the dough with water and sprinkle a covering of seeds or spices on the dough. If you want to precut the cracker, use a pizza cutter (rolling blade) and cut diamonds or rectangles in the dough. You do not need to separate the pieces, as they will snap apart after baking. If you want to make shards, bake the sheet of dough without cutting it first.

5. Bake for 15 to 20 minutes, or until the crackers begin to brown evenly across the top (the time will depend on how thinly and evenly you rolled the dough).

6. When the crackers are baked, remove the pan from the oven and let them cool in the pan for about 10 minutes. You can then snap them apart or snap off shards and serve.

Tahini sauce :
(Salatet tahina; served as dip; from Vogue EAT Oct/Nov 2008)

1 clove garlic, crushed
150g tahini paste
2 teaspoons white wine vinegar
juice of 1 lemon
1/4 teaspoon ground cumin
1/4 cup chopped flat-leaf parsley
paprika, to serve

Combine garlic, tahini and vinegar in a bowl, then whisk in lemon juice and 125ml (1/2 cup) cold water to form a creamy sauce. Stir in cumin and parsley. Season. Spoon into a bowl and sprinkle with paprika.

Comments (46)

Tags: , ,

Daring Bakers Challenge: All because we love.. Chocolate Eclairs

I am experiencing an Oprah moment. No, not one of those moments when she makes you realise you can solve all of life’s problems by reducing the number of wire hangers in your closet. Rather, I’ve bitten into a chocolate eclair and silence overwhelms me for a split second, before I moan, Oh, honey, hush! The audience roars in approval and in an instant, women are up from their seats, crying in joy when told they’re all getting free eclairs as well.

I recall at Tafe, when we were told that eclairs and profiteroles were good items to have on any menu because they were cheap to produce. Unfortunately a surfeit of cheap ingredients does not necessarily a good dessert make, which is what put me off eclairs to begin with. I’d tasted too many eclairs filled with imitation cream and compound chocolate, to ever consider the fact that they were worth making at home.

It wasn’t until a chance encounter with a slim finger of an eclair at Sadaharu Aoki’s patisserie in Tokyo, that I discovered how good these pastries can be, and how Oprah might approve of them too. Toothsome, silky, creamy and flavoursome; one bite alone reminded me of those TV ads featuring ladies who seem to do nothing all day but walk around langurously in expensive evening gowns, bathe in milk and eat Magnum ice-creams. Or Cadbury’s Milk Tray (“All because the lady loves…”)

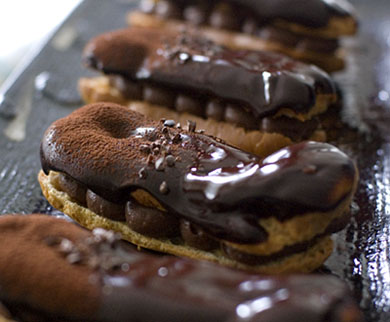
So I was incredibly happy to have managed to find some time to complete this month’s DB Challenge (and all because I now love….) : Pierre Herme’s Chocolate Eclairs! Usually I like to put my own spin on a recipe but this time I decided to stick to what was given. Partly, because I don’t recall ever having made chocolate pastry cream before and was keen to give it a go. Otherwise it would have been too tempting to have a range of different fillings, such as green tea, raspberry or banana caramel!

These eclairs are indeed Oprah-worthy. It is the sum of their parts that makes the whole, well worth the effort. Choux pastry if eaten plain is a bit boring; chocolate pastry cream, licked from the spoon is a bit meh, although the chocolate glaze is lovely and bittersweet. Combine all three components together, and you have fireworks.. or a standing ovation.

Thank you to Tony and Meeta who picked this month’s challenge. Check out their blogs for the recipe and don’t forget to look at what other fellow Daring Bakers came up with!

Comments (61)

Tags: , , ,

« Previous Page