This week, this life
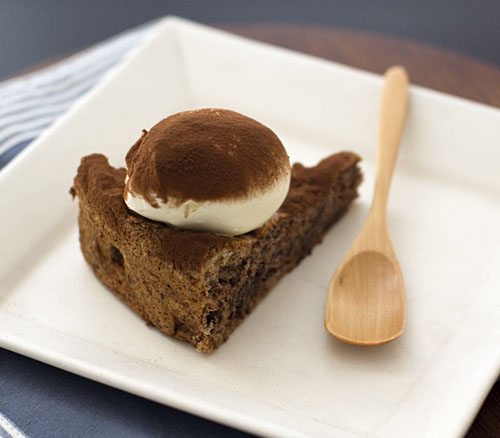

(Italian chocolate-almond torte)

It is a truth universally acknowledged that a baker in possession of a surfeit of eggwhites must make macarons.

While at times I have adhered to this rule, it is my preference to reject such truths. I enjoy taste-testing everything I bake, and macarons just don’t rock my sugar addicted taste-buds the way cakes and pastries do.

This dairy-free and gluten-free cake from one of my favourite baking books, is so delicious that I wish I had excess egg whites lying around more often. Surprising to think that it took me awhile to finally try this recipe, even though it had been recommended by others many times before. The idea of egg whites, sugar, chocolate and nuts had me initially envisioning some sort of meringue cake which I’d once made and disliked. This one however, tastes exactly like how you would want any good chocolate cake to be. Softly yielding, rich but light. So. Very. Chocolate.


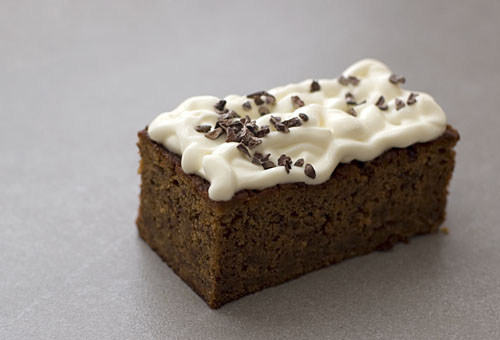
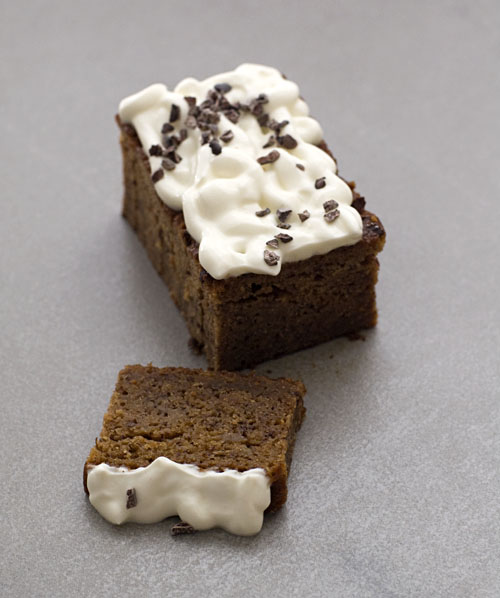
(Banana, yogurt and mesquite cake)

In case popping up after more than a month of not blogging comes as a complete surprise, I plead exhaustion and lack of time. At my current job, I’ve been working fairly long hours. That’s more of a statement than a complaint. In fact, I’m enjoying working in a kitchen more than ever. Long peppers, liquid nitrogen, toasted barley, preserved lemon meringues, caramelised milk crumbs and blistered buttery wafers now count amongst some of my favourite things.

Aside from perhaps too many conversations about cars and sports (football being the exception), I don’t mind the blokey atmosphere either, even if sometimes I’m tempted to request a token conversation about makeup and ‘feelings’.

As often as I can, I’ve been supplying this kitchen with snacks such as banana cake, to show my appreciation. Most people I’ve worked with, both past and present, often express complete surprise that I would spend my days-off baking. If you work 80+ hours on a regular basis, I probably wouldn’t either. Not only because it’s the cooking equivalent of taking your work home with you, but there’s probably nothing in the fridge at home anyway. Not even a carton of milk past it’s due by date. While I’m willing and able however, there will always be cake.

The idea of pairing banana with mesquite flour came about from a conversation with Kerry. Mesquite flour, from the bean of the mesquite plant, has a very distinctive sweet and spiced caramel flavour. It is especially good in chocolate chip cookies or even cookies such as these. Generally speaking, when using, I like to substitute up to 20% of the flour content with it.

Below are the recipes for both cakes, which I’ll hope you’ll go on and make to share with others. If you’re willing and able.

Italian chocolate-almond torte :
(Torta Cioccolata; recipe from Pure Dessert by Alice Medrich)

1 cup (140g) unblanched or blanched whole almonds
200g unsweetened chocolate, roughly chopped
1 cup sugar
1/8 teaspoon salt
7 large egg whites (1 cup)
1/4 teaspoon cream of tartar

Position a rack in the lower third of the oven and preheat the oven to 175’C. Grease the sides of a 9-inch springform pan and line the bottom with baking paper.

Combine the almonds, chocolate, 1/2 cup of sugar and the slat in a food processor and pulse until the almonds and chocolate are very finely chopped but not completely pulverized. Set aside.

Using a stand mixer, whisk the egg whites with cream of tartar until soft peaks form. Gradually add the remaining 1/2 cup sugar and continue to beat until the egg whites are stiff but not dry. Add one third of the nut mixture to the egg whites and fold in with a large rubber spatula until nearly incorporated. Fold in half of the remaining nuts, then fold in the rest of the nuts.

Scrape the batter into the prepared pan and spread it evenly. Bake until the torte has risen and is golden brown on top and a toothpick inserted in the center of the cake comes out clean, or with a little melted chocolate, 25 to 30 minutes. Set the pan on a rack to cool for 10 minutes. Remove the bottom of the pan and then the baking liner. Turn the cake right side up and cool completely. Cover or wrap tightly, and store for up to 3 days at room temperature.

[Note: if you can’t get a hold of unsweetened chocolate, use the darkest chocolate you can buy eg. 70% or 85% and reduce the amount of sugar in the recipe]

Banana, yogurt and mesquite cake :
(based on Pichet Ong’s banana cake recipe, as appears in The Sweet Spot)

78g unsalted butter, at room temperature
125g plain flour
30g mesquite flour
1 teaspoon baking powder
1 teaspoon baking soda
85g honey
72g light brown sugar
1/2 teaspoon ground cinnamon
1/2 teaspoon salt
228g roughly mashed bananas
1/2 teaspoon vanilla extract
1 large egg
130g full-fat plain European style/Greek yogurt

Preheat the oven to 175’C. Lightly butter an 8 1/2 x 4 1/2 inch loaf pan.

Sift together the flours, baking powder and baking soda and set aside.

Put the butter, honey, sugar, cinnamon and salt in the bowl of an electric mixer fitted with the paddle attachment. Beat the mixture on medium-high speed until light and fluffy, about 5 minutes. Scrape down the sides and bottom of the bowl, add the bananas and vanilla, and beat on medium speed until the mixture looks lumpy, about 1 minute. The bananas should be smashed, with a few small chunks remaining.

Turn the speed to medium-low and beat in the egg until incorporated. Gradually add the sifted flour mixture, mixing just until no traces of flour remain, about 10 seconds. Fold in the yogurt gently. At this point, you can also fold through a handful of cocoa nibs if you wish.

Transfer the batter to the greased pan. Bake in the center of the oven until a tester inserted in the center comes out clean, about 45 minutes. Cool the cake in the pan on a rack for 5 minutes, then unmold and cool completely on the rack.

Comments (47)

Tags: , , , , ,

The sweetest air

ChocSouffle4

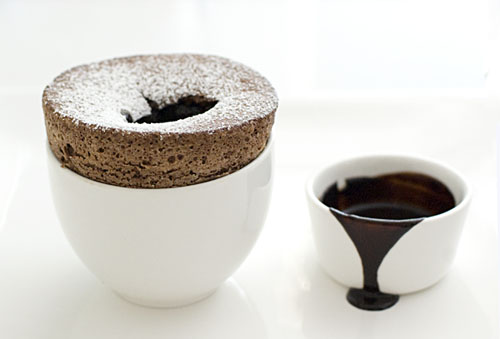
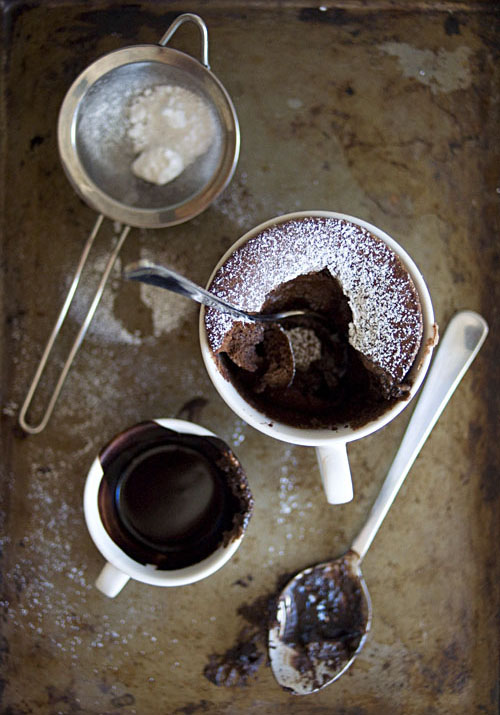
(Bitter chocolate souffle with warm chocolate sauce)

There are certain foods I am not a huge fan of eating, yet I still appreciate them as an art form because of the skill involved in their creation. Macarons are an example of this (a shocking admission, isn’t it?), as are souffles.

At one place I worked, we made our souffles a la minute. An order would come in, and we would start whipping the egg whites by hand, adding the sugar slowly, then finally incorporating the resulting meringue into a fruit flavoured base. Quantities were ‘eye-balled’, rather than measured, so it was very crucial to make sure you tasted everything before sliding the little perfectly shiny copper pot filled with souffle mix into the hot oven. No matter how many I may have made, I still got great pleasure from seeing the well risen end product swiftly dispatched by the waiter to the dining room.

The most memorable souffle I have ever eaten, was one served to us at Claude’s several years ago. Six of the most perfectly risen souffles arrived simultaneously at the table. We were instructed to make an indent in our souffles with a spoon, though which a waiter then poured a gloriously boozy custard. I ate -every- single last spoonful of it. It was wonderful and warming, and a tremendous way to end a meal.

VanillaSouffle

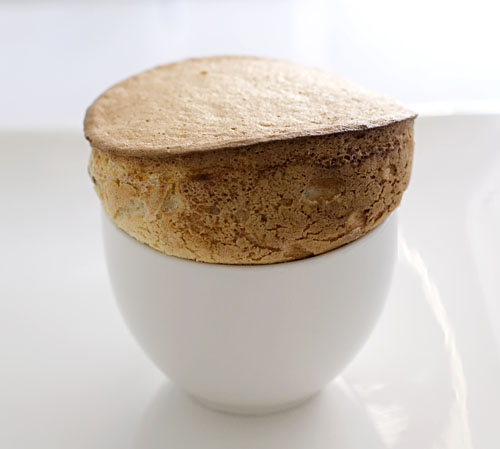
(Brandied fruit and vanilla souffle)

A good friend recently asked me for help in finding some suitable non-fruit based souffle recipes that she could use. I tried two, which with a bit of luck, ended up being very successful. Both souffles had great lift, were very stable, and were cooked just the way I prefer souffles to be – set around the outside, with a melting texture in the middle.

No recipe today, as I just wanted to share some pictures. It was my first time baking souffles at home, so I was keen to try my hand at photographing them too. The pictures turned out fairly well, even if the whole process was a combination of being a little frantic and hilarious at the same time. And you know what, I tasted them, and think I may be a fan of “certain” souffles after all!

ChocSouffle5

Comments (81)

Tags: , , , , ,

Daring Bakers Challenge : Nanaimo Bars

DaringBakers-Nanaimo

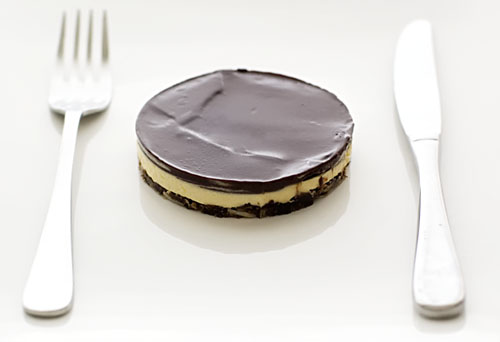
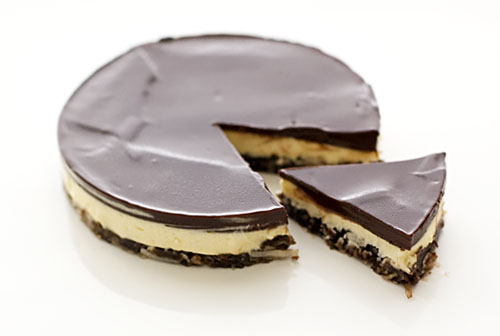
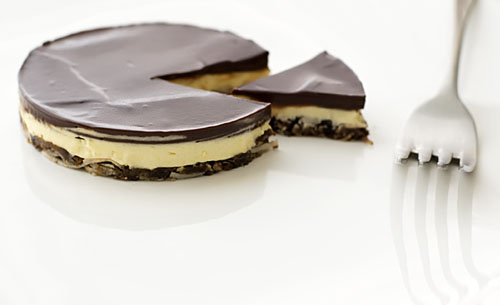
(Nanaimo Bar)

I wish there was an amusing story I could tell that related to these Nanaimo bars. The fact is, everything went really smoothly when I made them and because I had some time off from work, I even managed to complete the task a few weeks ago (instead of last-minute, as is my more typical modus operandi).

DaringBakers-Nanaimo2

Some months I have a sort of love-hate relationship happening with Daring Bakers challenges and there have been many times where I’ve contemplated relinquishing my membership, what with the demands of work and life stretching me both time and energy-wise.

It is both a negative and positive fact that I also sometimes find myself faced with recipes I wouldn’t normally contemplate making. Some people consider this A Good Thing and I’m one of these people. I don’t mind being taken out of my comfort zone and can honestly say that with every challenge so far, I’ve learned something new.

Besides, did I mention that I also love baking? I relish the opportunity to discuss ingredients and techniques with like-minded enthusiasts and love any excuse to scurry into the kitchen to make something I can later share with friends.

At some point however, I know I’ll have to face reality and accept that I’m not managing my time smartly. At some point, I’ll have to make the ‘sensible’ decision.

But right now, I’m having too much fun and don’t think I’m quite ready to give it up yet.

DaringBakers-Nanaimo3

The January 2010 Daring Bakers’ challenge was hosted by Lauren of Celiac Teen. Lauren chose Gluten-Free Graham Wafers and Nanaimo Bars as the challenge for the month. The sources she based her recipe on are 101 Cookbooks and www.nanaimo.ca.

For Gluten-Free Graham Wafers
Ingredients
138g sweet rice flour/glutinous rice flour
100g tapioca starch/flour
65g sorghum flour (or brown rice flour)
200g dark brown sugar, lightly packed
1 teaspoon baking soda
3/4 teaspoon kosher salt
100g unsalted butter (cut into 1-inch cubes and frozen)
80ml honey, mild-flavoured
75 ml whole milk
2 tablespoons (30 mL) pure vanilla extract

Directions:
1. In the bowl of a food processor fitted with a steel blade, combine the flours, brown sugar, baking soda, and salt. Pulse on low to incorporate. Add the butter and pulse on and off, until the mixture is the consistency of a coarse meal.
2. In a small bowl or liquid measuring cup, whisk together the honey, milk and vanilla. Add to the flour mixture until the dough barely comes together. It will be very soft and sticky.
3. Turn the dough onto a surface well-floured with sweet rice flour and pat the dough into a rectangle about 1 inch thick. Wrap in plastic and chill until firm, about 2 hours, or overnight.
4. Divide the dough in half and return one half to the refrigerator. Sift an even layer of sweet rice flour onto the work surface and roll the dough into a long rectangle, about 1/8 inch thick. The dough will be quite sticky, so flour as necessary. Cut into 4 by 4 inch squares. Gather the scraps together and set aside. Place wafers on one or two parchment-lined baking sheets. Chill until firm, about 30 to 45 minutes. Repeat with the second batch of dough.
5. Adjust the rack to the upper and lower positions and preheat oven to 180’C.
6. Gather the scraps together into a ball, chill until firm, and reroll. Dust the surface with more sweet rice flour and roll out the dough to get a couple more wafers.
7. Prick the wafers with toothpick or fork, not all the way through, in two or more rows.
8. Bake for 25 minutes, until browned and slightly firm to the touch, rotating sheets halfway through to ensure even baking.
9. When cooled completely, place enough wafers in food processor to make 1 ¼ cups of crumbs.

Nanaimo Bars
Ingredients:
For Nanaimo Bars — Bottom Layer
115g unsalted butter
50g granulated sugar
5 tablespoons unsweetened cocoa
1 large egg, beaten
1 1/4 cups gluten free graham wafer crumbs (See previous recipe)
55g almonds, finely chopped
130g shredded coconut

For Nanaimo Bars — Middle Layer
115g unsalted butter
40ml heavy cream
2 tablespoons vanilla custard powder
254g icing sugar

For Nanaimo Bars — Top Layer
115g semi-sweet chocolate
28g unsalted butter

Directions:
1. For bottom Layer: Melt unsalted butter, sugar and cocoa in top of a double boiler. Add egg and stir to cook and thicken. Remove from heat. Stir in crumbs, nuts and coconut. Press firmly into an ungreased 8 by 8 inch pan.
2. For Middle Layer: Cream butter, cream, custard powder, and icing sugar together well. Beat until light in colour. Spread over bottom layer.
3. For Top Layer: Melt chocolate and unsalted butter over low heat. Cool. Once cool, pour over middle layer and chill.

Comments (87)

Tags: , , , ,

« Previous Page · Next Page »