Persimmon, cinnamon and yogurt brioche tart
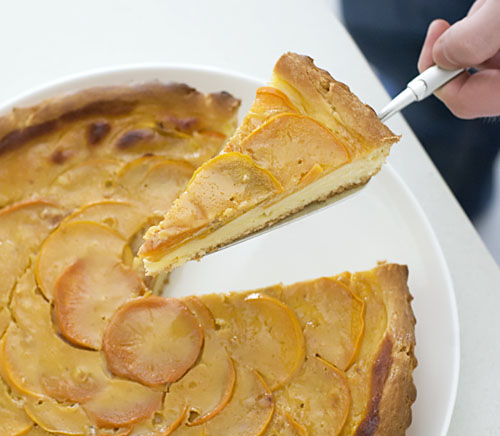
PersimmonBriocheTart2

(Persimmon, cinnamon and yogurt brioche tart)

As we turn our clocks back, marking the passing of one season to the next, I can’t help but get a little excited thinking about the fruits that are slowly making their way into our shopping baskets and onto our tables. Fruits such as pears, quinces, and my favourite childhood snack, persimmons.

We loved them so much as kids that whenever persimmons were in season, my father would buy them (always the crunchy, non-astringent kind) by the tray or bagful, have them washed and cut into quarters and left in a dish for anyone to pick and nibble on. I used to marvel at the way some of the fruit had speckled flesh, which made them look as though they had been fed cinnamon while growing.

We occasionally had the dried version of the fruit as well. It was usually thinly sliced and added to sweet soups, but I never really liked its flavour or texture and tended to keep a wide berth of it.

Strangely, I’ve been enjoying eating raw persimmons for so long now that it hadn’t occurred to me until recently, to try cooking with them. A conversation with a friend led me to envision pot-roasting the fruit with brown sugar and perhaps a twist of lemon and vanilla, or peeling and poaching them in St. Germaine (an elderflower liqueur) or a spiced tea syrup. Once cooked, I plan to pair the fruit with little chestnut teacakes or perhaps my favourite gluten-free buckwheat cake.

In the meantime, the baking bug had me craving a generous slice of brioche, so I made a simple brioche ‘tart’, topped with slices of persimmon and yogurt custard.
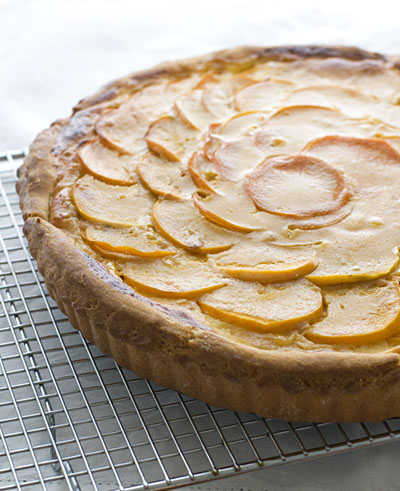
PersimmonBriocheTart

For this tart, I used Michel Roux’s brioche recipe from his book, Pastry. I have not provided the recipe for it here. You may already have your favourite, or if not, there are many recipes out there to choose from, even this gluten-free one. If persimmons aren’t in season, try figs and pears instead, or a mixture of berries.

Persimmon, cinnamon and yogurt brioche tart :

500g brioche dough, proved overnight in fridge (for a thinner tart or a more balanced fruit to brioche ratio, use 250g brioche dough and adjust baking time accordingly)
Yogurt custard (recipe below)
6 -7 small ripe persimmons (or 4 large ones)

Grease a 28 cm fluted tart tin. Roll the brioche dough out to a rough circle that is large enough to fit the tin and line the tin with the dough. Lightly press the edges up against the sides of the tin. Cover with clingfilm and allow to prove until double.

Preheat the oven to 180’C.

Slice the persimmons as thinly as possible (you can peel them first, if that’s your preference) and arrange them, slightly overlapping on the dough. Pour the custard over the persimmon slices. Bake in the oven for 15 minutes, then reduce the temperature to 150’C and continue baking for an additional 25 – 30 minutes or until the brioche is golden brown.

Allow the tart to cool until just warm before serving. This tart is best eaten on the day it is made.

Yogurt custard :

120g European-style/Greek yogurt
60g caster sugar
4 egg yolks
1 teaspoon ground cinnamon
1 tablespoon cornflour
1/2 teaspoon vanilla extract

Whisk all the ingredients together just to combine.

Comments (55)

Tags: , , , , ,

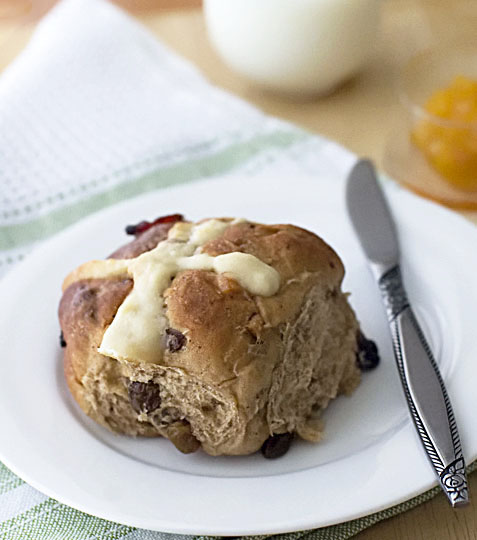
Hot Cross Buns : the 2010 Edition

HotCrossBuns2

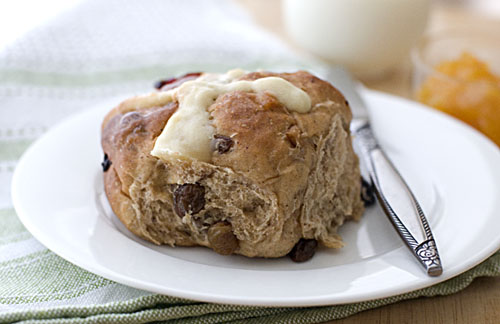
(Hot Cross Bun with homemade marmalade)

Is it just me, or does holiday baking seem to revolve around a lot of dried fruit? Currants and mixed peel for Christmas tarts, dried cranberry stuffing for Thanksgiving turkeys and for Easter, raisin-studded hot cross buns… Mind you, it’s not like I’m complaining. Some of my best friends are raisins.

Every year I make it a point to bake my own hot cross buns. Most years, I experiment with new recipes and last year, I made these which I actually still remember quite fondly. This year, I’ve only managed to find time to try one recipe.

But what a recipe it is. Dan Lepard’s recipe for spiced stout buns have a fantastic crumb and great depth of flavour from the use of stout (James Squire Porter, in my case) and black tea for soaking the fruit in, as well as a generous quantity of ground cinnamon, ginger and nutmeg. They were so tasty, B and I inhaled two each, straight from the oven.

I don’t mean two tiny bite-sized treats either. These are door-stopper sized buns, sticky with sugar glaze and heavy with juicy raisins. Eat two and you may want to consider skipping dinner. But eating two was the only way I knew how to adequately explain their deliciousness.

Forget Simnel cake, cookies shaped like bunnies and chickens and forget chocolate Easter eggs (you can get those at half price after Easter anyway). Trust me, all you need is a hot cross bun or two, ripped from a still-warm baker’s dozen, and a pot of hot tea. The rest of the holiday will sweetly unfold.

HotCrossBuns3

Comments (46)

Tags: , , , , ,

Having your cake and eating your tart too

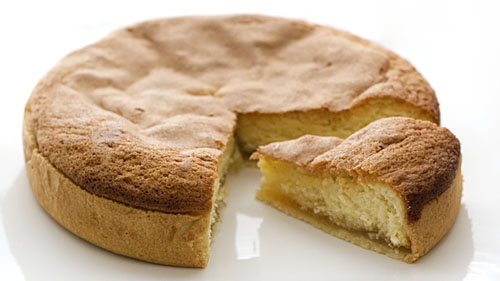
PineappleCakeTart

(Ananastaart : Pineapple Tart)

Brown food, it has to be acknowledged, is not the easiest thing to capture in enticing light. For someone who bakes, golden brown is probably one of the most attractive colours you could pull out of the oven. But for someone who also tries to take pictures of their baked goods, the same colour can be quite challenging to make look appetising.

I’ve noticed that I bake a lot of brown things, and that’s probably why I end up baking more than I blog. Let’s just say, for the majority of the time, I’d rather be eating than trying to take pictures of brown food 🙂

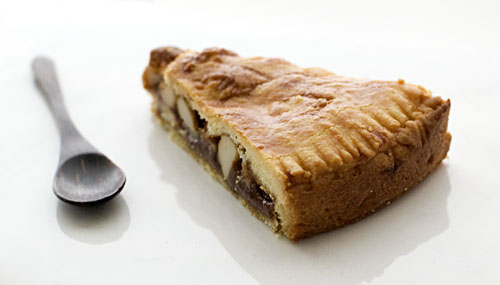
EngadineTart

(Engadiner Nusstorte : Swiss Walnut and Toffee Pie)

This Engadiner Nusstorte, made a week ago, was so delicious that I struggled to hang on to that last piece in order to take a picture. Early on in the week, I sternly pointed to the remaining slice in it’s plastic container, declaring to B that it was Strictly Photo Pie, so Hands Off. Even so, I managed to secretly (I think) shave bits off the slice until it was nearly in danger of becoming non-existent. Not long after a picture was finally taken and the pie was relegated back to Edible status, the slice disappeared.

The reason why I was so adamant about taking a picture this time was because I wanted to highlight a cookbook I bought recently, that has rapidly become one of my current favourites : Warm Bread and Honey Cake by Gaitri Pagrach-Chandra.

I love a cookbook that respects baking audiences enough to use not only cup measures, but also weight measures in grams and ounces. It also scores highly with me if it happens to feature a collection of interesting pictures, and not just ones that have been styled to the hilt. For example, check out p301 to see how kataifi pastry is traditionally made.

It also extends beyond what you’d expect from a typical baking book. There are none of the usual suspects here – no chocolate brownies or endless variations on a single cupcake recipe. Instead, Warm Bread and Honey Cake plays host to a fantastic collection of unusual recipes such as a pink-tinted Caribbean coconut roll (Salara), Chilean layered ‘drunken’ apple cake (Kuchen Borracho), Chinese steamed red bean buns, a whole chapter on Turkish sweets and savouries, and many lovely looking Dutch recipes (the author also has a book on Dutch baking called Windmills in my Oven).

Not to mention the pineapple cake tart above either. Cake and tart in one hit? What’s not to like? It was delicious, but perhaps slightly overshadowed by the power of a pie that encases nuts and toffee in a single breath. The recipe for the pie is below.

Swiss Walnut and Toffee Pie :
(Engadiner Nusstorte or Bündner Nusstorte, from Warm Bread and Honey Cake by Gaitri Pagrach-Chandra)

Pastry :
300g plain flour
1/4 teaspoon salt
150g butter, chilled and cubed
100g icing sugar
1 egg, beaten

Filling :
250g caster sugar
2 tablespoons water
2 tablespoons honey, light corn syrup or liquid glucose
150ml double (heavy) cream, warmed
250g walnuts, coarsely chopped [Note : I used macadamia nuts]

Make the pastry first. In a large bowl, mix the flour and salt. Rub in the butter until the mixture resembles fine breadcrumbs. Add the icing sugar and rub in until well incorporated. Or simply put all the ingredients in a food processor and pulse until it resembles fine breadcrumbs, then transfer to a bowl.

Reserving 2 tsp egg, add the rest to the bowl and use your fingertips to bring it together. Add a few drops of water if necessary. Cover with clingfilm and chill while you make the filling.

Have a pair of oven mitts standing by. Put the sugar, water and honey in a large heavy-based saucepan over medium heat. Stir gently to dissolve the sugar. Bring to the boil and let it continue to boil until it becomes a dark golden colour. Stir from time to time.

Put on the oven mitts and pour the warm cream into the saucepan in a steady stream, stirring continuously. It will hiss and bubble ferociously, but the mitts should protect your hands and arms. Keep on stirring the mixture on medium heat until it is creamy and slightly thickened. To test, pour 1 tsp onto a cold saucer and tilt it after a few seconds. The mixture should spread slowly and not disintegrate into rivulets. Remove the saucepan from the heat and stir in the walnuts, coating them well. Set aside to cool.

Preheat the oven to 180’C. Grease a 24cm springform tin.

To assemble the pie, the pastry should be chilled but still malleable, or it will break when you roll it. Divide the pastry into two portions, one slightly larger than the other. Roll out the larger portion between two sheets of clingfilm to a 30cm circle and use it to line the tin. (Use the bottom sheet of clingfilm to help move it, removing the sheet once the pastry is in place). Press the edges of the pastry against the side of the tin.

Scrape the filling onto the pastry. Level the top as well as you can, but don’t apply too much pressure, or you may tear the pastry and the filling will leak out. Fold the excess pastry inwards over the filling.

Roll the second piece of pastry to a neat 22cm circle. Trim if necessary. Moisten the edges of the pastry base in the tin with a little water and position the second pastry circle on top of this. Use a fork to crimp and seal the edges. Brush with the reserved egg and prick with a fork in several places. If you like, you can score a plaid pattern onto the surface with the fork.

Bake for 35-40 mins, or until golden brown. Leave to cool until lukewarm in the tin, then loosen the sides, release the clip and carefully transfer the pie to a wire rack to cool completely.

Comments (72)

Tags: , , , , ,

« Previous Page · Next Page »