(Not just) A Chocolate Brownie

I did a silly thing the other day. A friend came by with the gift of a bag of chestnuts after a recent chestnut picking trip to the Blue Mountains. (How exciting that the season is finally upon us!) I had so many grandiose plans for those shiny little beauties. But first, B showed me how to have a proper old fashioned conker fight. Then, after two chestnuts were suitably destroyed in a highly unskilled contest of extremely random proportions, I set about cooking and painstakingly peeling every single nut left in the bag.
Unfortunately, when it came to cooking a large portion of the peeled chestnuts in order to transform them into a puree, I committed a cooking sin : I walked away from the stove. Yes, not-watching-the-pot-on-the-stove. That ole chestnut!
*sigh*
The pain of losing all those chestnuts (and the frustration of having to scrape a burnt pot) left me in no mood to pursue plan A. We had the remaining chestnuts that evening, in a sauce, with potato gnocchi (a Locatelli recipe). Having shelved my chestnut ideas for dessert, I decided to make something comfortingly chocolate instead.

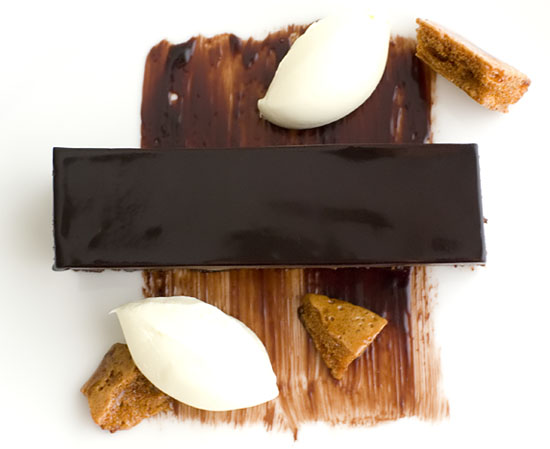
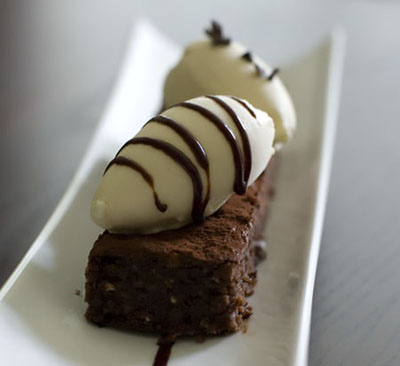
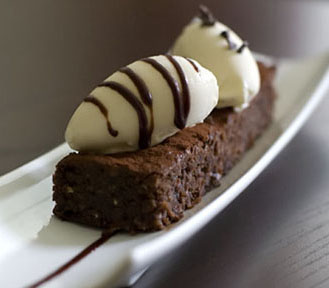
This chocolate brownie surely scores points for being the ultimate in brownie decadence. A brownie, with a baked layer of chocolate cream reminiscent of chocolate brulee, topped with a shiny chocolate glaze. The original had an additional chocolate decoration on top but since I didn’t have the necessary ingredients for it, I omitted that component.
As this dessert is quite rich, I would recommend halving the recipe and making it in a rectangular baking tin with dimensions roughly similar to 18 x 25 x 4cm. It is pretty complete on it’s own and doesn’t even require the garnishes I have included. Cut the resulting brownie into small fingers and share with all the chocoholics in your life. Especially the ones who bother to bring you bags of chestnuts which you subsequently turn into cinder.
[Update : To anyone making the recommended 1/2 recipe, note that your brownie layer will be thinner than mine because I forgot to reduce the brownie component of the recipe when I made the mix. You can proceed with a full brownie recipe, but a 1/2 recipe will probably make for better eating, because you will get a better chocolate cream : brownie ratio. If you do a 1/2 recipe for the brownie component, make sure you reduce your baking time accordingly.]
Chocolate Brownie :
(serves 10 – 12; from Dessert by David Everitt-Matthias)
for the chocolate brownies :
2 eggs
175g caster sugar
240g bitter chocolate (64% cocoa solids)
150g unsalted butter, melted
seeds from 1 vanilla pod
20g cocoa powder
1/2 teaspoon baking powder
60g plain flour
100g hazelnuts, toasted, skinned and finely chopped [I used macadamias]
100g bitter chocolate (71% cocoa solids), finely chopped
Whisk the eggs and sugar together until thick and pale. Put the 64% chocolate in a large bowl and melt over a pan of simmering water or in a microwave. Stir in the melted butter and vanilla, then fold in the egg mixture. Sift together the cocoa powder, baking powder and flour and fold them in too. Add the nuts and chopped chocolate, then transfer the mixture to a grased and lined 12 x 36 x 4cm baking tray and place in an oven preheated to 180’C. Bake for 20 – 25 minutes, until just cooked but still a little soft in the middle. Remove from the oven and leave to cool while you make the chocolate cream.
for the chocolate cream :
400ml double cream
400ml milk
140g egg yolks (about 4)
100g caster sugar
500g bitter chocolate (71% cocoa solids), chopped
Bring the cream and milk to the boil in a heavy-based saucepan, then remove from the heat. Whisk the egg yolks and sugar together, then pour on the cream, whisking to combine. Return the mixture to the saucepan and cook gently for 2 minutes. Put the chopped chocolate in a bowl and pour on the cream mixture, whisking until the chocolate has dissolved. Pass through a fine sieve. Press the edge of the brownie against the sides of the tin to make sure there aren’t any gaps, then immediately pour on the warm chocolate cream, leaving a 2mm gap at the top of the tin for the glaze. Place the tin in an oven preheated to 150’C and cook for 20 – 25 minutes, keeping your eye on it. The cream should be just set and wobble very slightly in the middle. Remove from the oven, allow to cool for 3 – 4 minutes and then stretch a piece of cling film over the tin; this will allow the cream to finish cooking in its residual heat. When it is completely cold, place in the fridge for 1 hour.
for the chocolate glaze :
150ml water
175g caster sugar
55g cocoa powder
125ml double cream
2 1/3 gelatine leaves
40g bitter chocolate (64% cocoa solids), chopped
Put the water and caster sugar in a saucepan and bring to the boil, stirring to dissolve the sugar. Whisk in the cocoa powder and cream, bring back to the boil, then turn the heat down and simmer for 10 minutes.
Soak the gelatine in cold water for about 5 minutes, until soft and pliable, then squeeze out all the water. Remove the pan from the heat and add the gelatine, stirring until dissolved. Leave to cool for 3 – 4 minutes, then pour on to the chopped chocolate, whisking until it has melted. Pass through a fine sieve and leave to cool.
Remove the brownie from the fridge and spread a layer of the cooled glaze on top, smoothing the surface so it is level with the top of the tin. Return to the fridge to set.
To serve, carefully remove the brownie from the tin and cut it into portions, using a warm, wet knife.

(PS: I forgot to mention in the previous post that I have finally joined Twitter. My one concession to a life otherwise free from Mybook/FaceSpace blah. I’m not sure if I will actually use it much. In fact, I barely know how to use it at this stage, but I thought I would sign up anyway, and see how things go from there).
Tags: beetroot, brownie, chocolate, plated dessert


