Daring Bakers Challenge : Nanaimo Bars
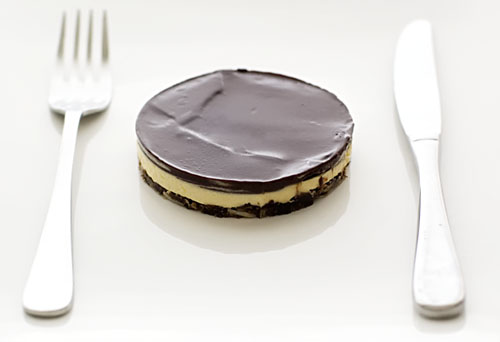
DaringBakers-Nanaimo

(Nanaimo Bar)

I wish there was an amusing story I could tell that related to these Nanaimo bars. The fact is, everything went really smoothly when I made them and because I had some time off from work, I even managed to complete the task a few weeks ago (instead of last-minute, as is my more typical modus operandi).
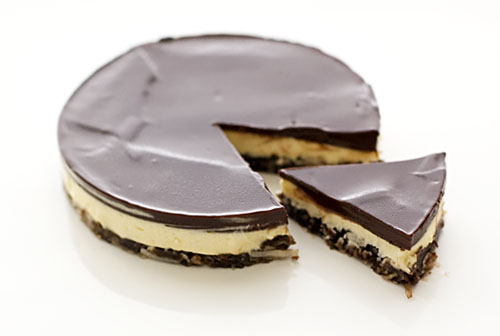
DaringBakers-Nanaimo2

Some months I have a sort of love-hate relationship happening with Daring Bakers challenges and there have been many times where I’ve contemplated relinquishing my membership, what with the demands of work and life stretching me both time and energy-wise.

It is both a negative and positive fact that I also sometimes find myself faced with recipes I wouldn’t normally contemplate making. Some people consider this A Good Thing and I’m one of these people. I don’t mind being taken out of my comfort zone and can honestly say that with every challenge so far, I’ve learned something new.

Besides, did I mention that I also love baking? I relish the opportunity to discuss ingredients and techniques with like-minded enthusiasts and love any excuse to scurry into the kitchen to make something I can later share with friends.

At some point however, I know I’ll have to face reality and accept that I’m not managing my time smartly. At some point, I’ll have to make the ‘sensible’ decision.

But right now, I’m having too much fun and don’t think I’m quite ready to give it up yet.
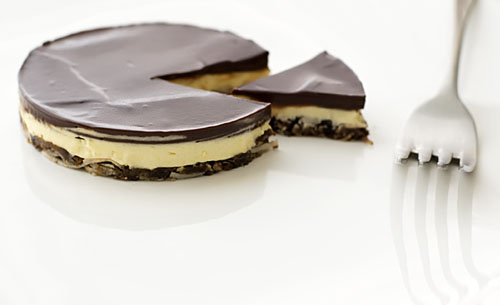
DaringBakers-Nanaimo3

The January 2010 Daring Bakers’ challenge was hosted by Lauren of Celiac Teen. Lauren chose Gluten-Free Graham Wafers and Nanaimo Bars as the challenge for the month. The sources she based her recipe on are 101 Cookbooks and www.nanaimo.ca.

For Gluten-Free Graham Wafers
Ingredients
138g sweet rice flour/glutinous rice flour
100g tapioca starch/flour
65g sorghum flour (or brown rice flour)
200g dark brown sugar, lightly packed
1 teaspoon baking soda
3/4 teaspoon kosher salt
100g unsalted butter (cut into 1-inch cubes and frozen)
80ml honey, mild-flavoured
75 ml whole milk
2 tablespoons (30 mL) pure vanilla extract

Directions:
1. In the bowl of a food processor fitted with a steel blade, combine the flours, brown sugar, baking soda, and salt. Pulse on low to incorporate. Add the butter and pulse on and off, until the mixture is the consistency of a coarse meal.
2. In a small bowl or liquid measuring cup, whisk together the honey, milk and vanilla. Add to the flour mixture until the dough barely comes together. It will be very soft and sticky.
3. Turn the dough onto a surface well-floured with sweet rice flour and pat the dough into a rectangle about 1 inch thick. Wrap in plastic and chill until firm, about 2 hours, or overnight.
4. Divide the dough in half and return one half to the refrigerator. Sift an even layer of sweet rice flour onto the work surface and roll the dough into a long rectangle, about 1/8 inch thick. The dough will be quite sticky, so flour as necessary. Cut into 4 by 4 inch squares. Gather the scraps together and set aside. Place wafers on one or two parchment-lined baking sheets. Chill until firm, about 30 to 45 minutes. Repeat with the second batch of dough.
5. Adjust the rack to the upper and lower positions and preheat oven to 180’C.
6. Gather the scraps together into a ball, chill until firm, and reroll. Dust the surface with more sweet rice flour and roll out the dough to get a couple more wafers.
7. Prick the wafers with toothpick or fork, not all the way through, in two or more rows.
8. Bake for 25 minutes, until browned and slightly firm to the touch, rotating sheets halfway through to ensure even baking.
9. When cooled completely, place enough wafers in food processor to make 1 ¼ cups of crumbs.

Nanaimo Bars
Ingredients:
For Nanaimo Bars — Bottom Layer
115g unsalted butter
50g granulated sugar
5 tablespoons unsweetened cocoa
1 large egg, beaten
1 1/4 cups gluten free graham wafer crumbs (See previous recipe)
55g almonds, finely chopped
130g shredded coconut

For Nanaimo Bars — Middle Layer
115g unsalted butter
40ml heavy cream
2 tablespoons vanilla custard powder
254g icing sugar

For Nanaimo Bars — Top Layer
115g semi-sweet chocolate
28g unsalted butter

Directions:
1. For bottom Layer: Melt unsalted butter, sugar and cocoa in top of a double boiler. Add egg and stir to cook and thicken. Remove from heat. Stir in crumbs, nuts and coconut. Press firmly into an ungreased 8 by 8 inch pan.
2. For Middle Layer: Cream butter, cream, custard powder, and icing sugar together well. Beat until light in colour. Spread over bottom layer.
3. For Top Layer: Melt chocolate and unsalted butter over low heat. Cool. Once cool, pour over middle layer and chill.

Comments (87)

Tags: , , , ,

Playing favourites

CarrotPineappleCake

(Sticky Carrot, pineapple, ginger and macadamia cake)

This is my favourite carrot cake. There are many others like it, but this one is mine.

To think, I didn’t even give it a second glance when I first saw the recipe in one of my favourite cookbooks. It was a chance conversation with a friend that led me to give it a go. You know you have to when people whose opinion you trust, exclaim, “You must make it! It’s soooo good!”, while their eyeballs are rolling to the back of their head and they’re dribbling a little at the thought.

So after I’d cleaned up the mess she had made to the carpet, I resolved to buy some carrots and try the cake. This was almost a year ago. Since then, I’ve made it a few more times and it’s still as luscious and lip-smackingly moist as ever.

Don’t be daunted by the seemingly long list of ingredients. It takes less time to measure out than you think. Don’t stint on the frosting either. If you’re on a New Year’s health kick (like many people I know), you could substitute some of the sour cream for thick yogurt. Whatever you do, don’t omit the frosting entirely! It truly completes the entire cake-eating experience.

The recipe? Why here it is, but should you attempt it, please don’t blame me if any random drooling occurs.

Sticky pineapple, carrot, ginger and macadamia cake :
(serves 12 – 16; from Mix & Bake by Belinda Jeffery)

for the cake :
300g plain flour
1 teaspoon baking powder
2 teaspoons bicarbonate of soda
1 1/2 teaspoons ground cinnamon
1/4 teaspoon ground nutmeg
1/4 teaspoon salt
440g caster sugar
35g shredded coconut
120g roasted macadamias, roughly chopped
6 pieces crystallised ginger, finely chopped
3 eggs
60ml buttermilk
60ml macadamia oil or light olive oil
2 cups grated carrot (approximately 4 medium-sized peeled carrots)
1 teaspoon vanilla extract
1 x 440g can crushed pineapple (in natural juice), drained
toasted coconut chips, to serve

for the sticky glaze :
110g caster sugar
60ml buttermilk
60g unsalted butter
2 teaspoons golden syrup
1 teaspoon vanilla extract

for the vanilla cream :
250ml thickened cream
190ml sour cream
1 1/2 tablespoons icing sugar, sifted
1 teaspoon vanilla extract

Preheat your oven to 180’C. Butter two shallow 23 or 24cm round cake tins. Line the bases with buttered baking paper then dust the tins with flour. Set aside.

Sift the flour, baking powder, bicarbonate of soda, cinnamon, nutmeg and salt into a large bowl. Add the sugar and mix everything together with a balloon whisk for 1 minute. Add the shredded coconut, macadamias and ginger and toss them about so they’re well coated in the flour mixture.

In a separate bowl, lightly whisk the eggs, then whisk in the buttermilk and oil until just combined. Use a spatula to stir in the carrots, vanilla extract and drained pineapple. Pour this mixture into the dry ingredients and stir them together until just combined.

Divide the batter evenly between the cake tins. Sit them on the middle shelves of the oven and bake them for about 40 minutes or until the centre of each springs back when lightly pressed.

Meanwhile, to make the sticky glaze, put all the glaze ingredients except the vanilla extract into a small saucepan over medium-heat. Stir until the sugar has dissolved, then bring it to the boil. As soon as it boils, reduce the heat to low-medium so the syrup bubbles steadily and cook, stirring, for 4 minutes. Remove from the heat and add the vanilla extract, then set aside in a warm spot.

When the cakes are ready, transfer the tins to a wire rack. Leave them in their tins and immediately pour half of the sticky glaze over each cake, tilting them so the tops are evenly coated. Leave them to cool for 30 minutes. Remove the cakes from the tins, discard the baking paper and let them cool completely on wire racks.

For the vanilla cream, put all the ingredients into a bowl and whisk carefully just until soft peaks form. Gently loosen under one of the cake layers and sit it on a serving plate. Spread about half of the cream evenly over the top, leaving a slight border all around (this is so the cream doesn’t squish out the sides when the next layer goes on). Sit the second layer on this. Spread the remaining cream evenly over the top. To finish it off, dot the toasted coconut flakes over the top of the cake. Refrigerate until ready to serve.

Comments (44)

Tags: , , , ,

Back to it, a pillow cheesecake and a giveaway.

Helen-PillowCheesecake

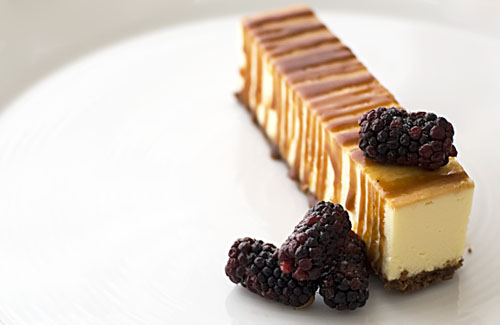
(Helen’s Pillow Cheesecake with salted butter caramel sauce)

So I woke up this morning and wondered where on earth my holiday had gone to. I looked for it in all the typical places – the back pockets of my favourite pair of jeans, behind the door, under the couch – before realising that just like the last cookie in the jar, my holiday had already been consumed.

With typical perfect timing, my oven has also chosen this very moment, to break down. This oven, the sun, all pushing me towards the inevitable conclusion that is, the start of work.

Sigh.

In examining the remaining crumbs of my holiday, I realised that despite it’s brevity, there’s probably not much I could complain about. The weather had been kind, I managed to squeeze in some face-time with a few close friends and I started and finished two books (The White Tiger by Aravind Adiga and Surrender by Sonya Hartnett); an accomplishment these days when cookbooks are my main distraction.

Countless days of sleeping-in aside, my employers might be quite glad to hear that I’ve missed work and am actually looking forward to returning. Not to take anything away from the fact that I loved the kicked up feet, the new indent I’d made in our couch and the pleasure of forgetting-what-day-it-was. Some people have claimed I perform best under pressure and while I’ve vocally pishposh-ed their opinion, I’ve also quietly thanked them for the compliment. In our industry, to be told that you perform well under pressure is like getting the cherry bonus in a game of PacMan. (Confession : I don’t play PacMan particularly well).

I have decided to commemorate my return to work with a post and a giveaway. Since I’ve been on holiday (read : lazy), I haven’t been taking many pictures, so had to dig up a photo taken late last year of a cheesecake I made after coming across an old post of Helen’s. You can find the recipe here, and believe me when I say, this recipe is as much about the cheesecake as it is about that salted butter caramel sauce. Do not attempt to make one without the other!

As for the giveaway, I have to admit that this blog has never been able to afford giveaways. Lemonpi started out as a personal journal and I’d like to think it will always remain that way. I have no grandiose plans for it. It just is, and while it remains fun, it will continue to exist. So for my giveaway, I’m offering free compassion* to every reader who leaves a comment. If compassion isn’t your thing, then I hope you at least got a free smile for the day, from reading this post.

*Compassion is limited to one comment per reader only.

Comments (103)

Tags: , , , ,

« Previous Page · Next Page »