May 10, 2016 at 1:38 pm
Lately there has been an ongoing dialogue in my head about food choices. I bake a lot at home, so I’m well aware of how much basic ingredients cost. Ever since B briefly embarked on a low FODMAP diet, I’ve really embraced baking with organic spelt flour. Currently, spelt is more than twice the price of plain wheat flour and true free-range eggs are almost $1 per egg, for starters.
When I eventually open a bakery one day, I’d like to continue using the best ingredients I can. A friend remarked that my ideals will probably have to take a backseat once I start having to think in terms of how to run a viable business. Maybe that’s true. Maybe that’s why someone once asked me if it was really that important that his business continue to use organic, pesticide-free flour, after he started looking into how much it was costing. Maybe that’s why I’ve seen a popular cafe in the city use caged eggs (displayed in plain sight, in their open kitchen). Or why some clearly-not-struggling restaurants would choose to not use free-range meat.
In a city where most people have the mindset that Asian food should be cheap, bread should not cost more than $X and cakes need to be cheap and colourful in order to appeal, I wonder if I’ll be able to bake for a living, doing it the way I prefer to, and still sleep well at night.
Permalink
December 9, 2015 at 12:45 pm
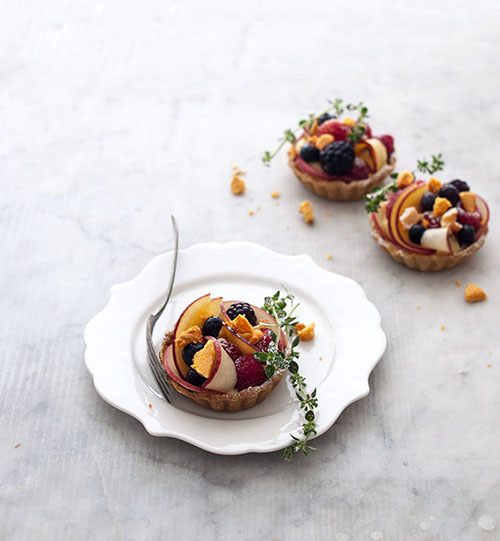 (Summer fruit tarts)
I love running. Not for the feeling of the wind in my hair, or the way your limbs ache in a pleasing way at the end of the line. I love running because when you’re running, there are no interruptions. No phone you have to answer, no “I’ll just quickly Google that”, or “Maybe I’ll catch up on Jessica Jones on Netflix”.
Running gives me time to think. Unfortunately, most of my “thinking” tends to veer sharply towards the solemn contemplation of potential baked goods (thereby negating all the good work that running accomplishes). Which is incidentally how I came about to make a big batch of shortcrust pastry. Battling sweat and aching limbs, visions of Summer berries popped into my head (or maybe it was just bright lights and blurred vision caused by heat exhaustion).
My favourite thing to do with berries is actually nothing at all. Eat them plain and eat them often, I say. But there’s no denying that they also look fabulous perched on top of softly whipped vanilla cream in a buttery tart shell. And with that, afternoon tea is sorted. For extra pizzazz, I topped the fruit tarts with sugared thyme. (Isn’t pizzazz such a great word? If I had a pizza shop, it definitely be called Pizzazz.)
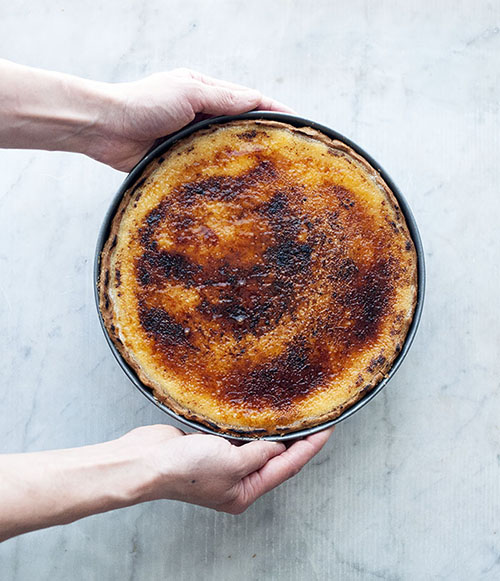 (Vanilla brulee tart)
My current favourite easy recipe for pastry can be found here. Belinda Jeffery’s recipe, which also appears in her book Mix & Bake, is incredibly versatile. I’ve used it in both sweet and savoury applications to great effect.
Tips for pastry success : Heat is the enemy, when it comes to making or rolling out pastry. Keep everything as well chilled as possible. Also chill your lined tart shell before blind baking. This helps retain the shape of the shell. A blind baked shell can be used in all sorts of ways, such as the fruit topped tarts above. Alternatively, fill it with vanilla custard and brulee to give that golden burnished finish. The filling was based on this recipe.
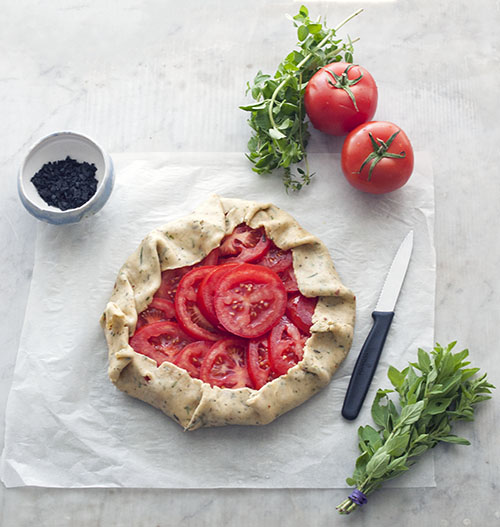
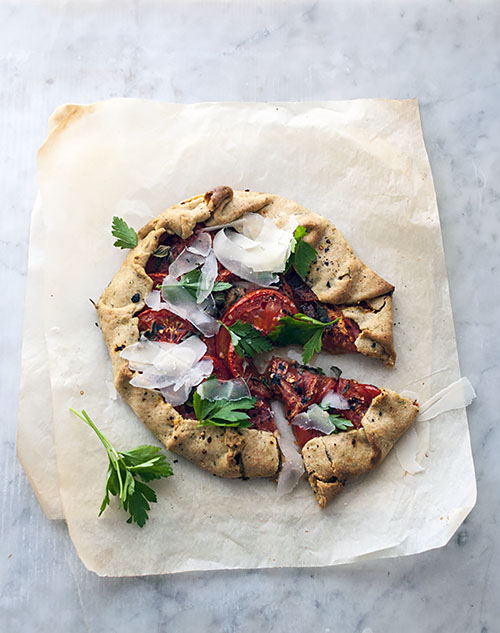 (Tomato, herb and chilli crostata)
If you find yourself allergic to lining tarts and engaging in all that blind-baking nonsense, make free form crostatas instead. Roll the dough out into a rough circle, fill with something sweet or savoury (in this case, Summer-kissed tomatoes and herbs) and bake for about 30-35 mins at 175’C. You’d break into less of a sweat making this than you would running.
Permalink
Tags: crostata, fruit, pastry, recipe, savoury, tart
November 8, 2015 at 8:27 am
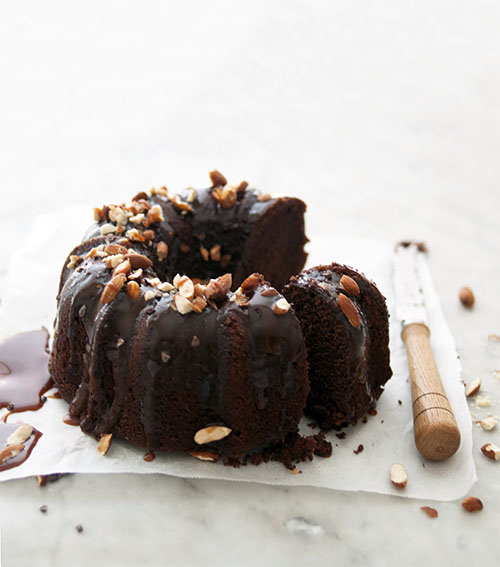
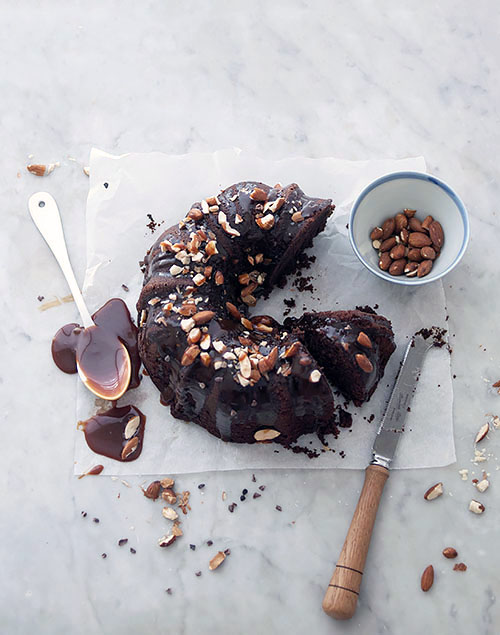 (Chocolate Fudge Cake, Salted Caramel and Toasted Almonds)
Call me boring and predictable, but my Desert Island cake would undoubtedly be chocolate. Even long after falling under the spell of swaying palm trees and a cool salt scented breeze, some of us still need our daily chocolate fix. As soon as I wade ashore, marooned with my 2 chickens (eggs), a cow (for cream and butter) and, somehow, the knowledge of how to cobble together a working oven out of coconut husks and sheer determination, a cake would be baking and a kettle brewing for tea. Paradise sorted.
The cake is from Rose Levy Beranbaum’s Heavenly Cakes cookbook. If you haven’t yet gotten the book (and you really should), you can also find an adapted version of the recipe here.
On its own, the cake is moist, perfectly chocolatey and really doesn’t need dressing up. But if you want to take the cake from desert island to dessert island, a casual drizzle of warm salted caramel and sprinkle of chopped almonds certainly wouldn’t go astray.
Salted Caramel Sauce For A Desert Island Cake :
(makes enough for 1 cake; based on a Tartine recipe)
120g caster sugar
10g liquid glucose
1/4-1/2 teaspoon sea salt (depending on your preference)
1/2 teaspoon vanilla extract
25g unsalted butter
squeeze of lemon juice
80g single/pouring cream
Melt the sugar and liquid glucose in a medium-large pot. Cook until it caramelises (you want it a nice dark colour, but not burnt). Turn the heat off, carefully add in the cream (the mixture will splutter), vanilla, butter, lemon juice and salt. Whisk until combined, then strain into a heatproof bowl and allow to cool before using. Just before serving, drizzle onto cake (you can warm the sauce up a little if need be) and top with chopped toasted almonds.
Permalink
Tags: almonds, cake, caramel, chocolate, recipe

