The certainty of uncertainty


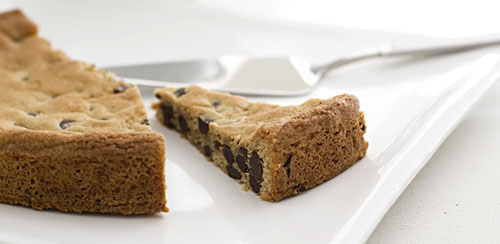
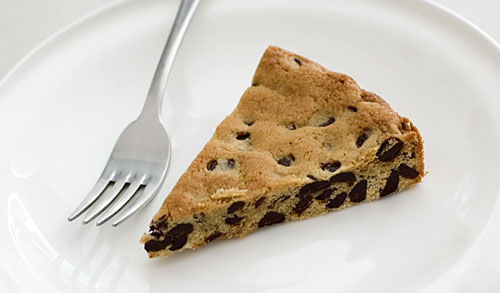
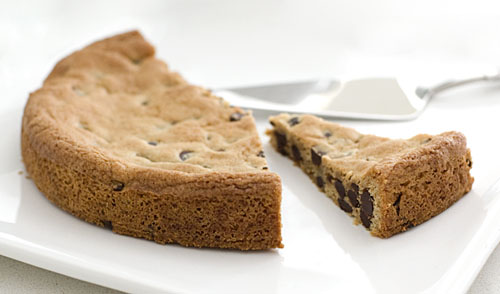
(Chocolate Chip Cookie Cake)

If there’s one thing you can be certain of in life, is that the uncertain will always happen.

Shuna has written more eloquently about change before. I on the other hand, have at times attempted to fumble through some sort of explanation. An explanation about my long absence from blogging. About how a friend can possibly tell from my tweets alone, that I have been feeling sad and deflated. About why I’m leaving, despite writing to every possible friend and family member in my address book only a year ago, to tell them about the dream job I had just landed.

I considered fumbling, but finally decided not to. I had an epiphany not too long ago. Not quite the kind that involves dropping everything and moving to a far corner of the Earth to help save endangered wild life, but still something along similar lines of acquiring personal happiness and satisfaction.

When I look up past chapters of my working life, I know there will be many people to miss. Even the guy who delivers our bottled water, who is extremely friendly despite looking like he could tear your head off with one finger. Yep, I’ll miss him too.

So anyway. Can we talk cake?

Admittedly, when I first made this cake, I was a little sceptical, and therein lies the genius of this recipe. It is a ridiculously simple concept that is so clever at the same time, it makes you wish you’d thought of it first. Basically, it’s a thicker version of a chocolate chip cookie, underbaked so that it retains cake-y characteristics. It is incredibly delicious eaten at any time of the day and lasts forever, if there is such a thing as ‘forever’, when it comes to cake.

The cake comes with a ganache that you drizzle over the top, but I have omitted it because I like the cake just as it is. This recipe is in US cup measures. Buy the book if you’re keen to make more New Orleans-style sweets.

Chocolate Chip Cookie Cake :
(from Dam Good Sweet by David Guas and Raquel Pelzel)

1 stick (113g) butter
1 1/4 cup semisweet chocolate chips (58%-62% cacao)
1 cup plain flour
1 1/2 teaspoons baking powder
1/4 teaspoon salt
1 cup light brown sugar
1 teaspoon vanilla extract
1/2 teaspoon almond extract
1 large egg

Preheat the oven to 175’C.

Whisk the flour, baking powder and salt together in a medium bowl and set aside. Using a stand mixer or a hand mixer, cream the butter, light brown sugar, and vanilla and almond extracts on medium speed until well combined, about 1 minute. Increase the mixer speed to high and beat for 15 seconds. Stop the mixer, scrape down the sides of the bowl, and add the egg. Blend on medium speed for 30 seconds. Add the dry ingredients and combine on low speed until just a few dry streaks remain. Add the chocolate chips and mix for a few seconds until combined.

Scrape the batter into a greased and lined 10-inch round cake tin. Press the batter into a smooth and even layer in the pan. Bake until lightly golden and puffy around the edges (the center should still feel quite soft), 18 – 22 minutes. Cool for 10 minutes and then run a paring knife around the edge of the pan to release the cake. Cool for at least 4 hours before turning the cake out of the pan and onto a large plate.

Comments (68)

Tags: , , ,

For the love of friends

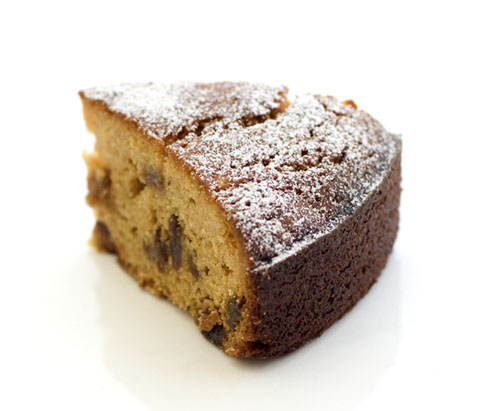
StickyGingerYogurtCake

(Sticky ginger, golden syrup and yogurt cake)

This post had a beginning, but I decided to truncate it and concentrate on my main objective instead, which is to write this in appreciation of friends who have been supportive and helpful of late. You all know you who are, and since I’m not very good at expressing myself in person, I have decided to say it with another thing that I love : yogurt.

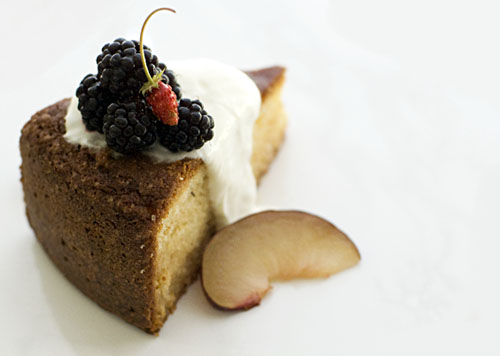
YogurtLavenderCake3

(Yogurt lavender cake)

Full fat, European-style cow’s milk yogurt, which I tend to always keep a carton of in my fridge. If ever I needed to put forward a case for the planet-threatening, methane-belching cow, bovine yogurt would form one of my principle arguments. Granted, far more environmentally friendly four-footed creatures have graced this planet and yielded us many pleasures in a 125ml easy-peel tub. Sheep’s milk yogurt for example, which is very flavoursome and can also be used in all these instances. I guess I just have a soft spot for something I grew up eating so regularly – who, as a kid, didn’t lick the smear of yogurt off the yogurt tub lid?

As B is intolerant of most dairy products except yogurt, I often use it as a substitute for cream, buttermilk or sour cream in certain recipes. Along with a dash of rice vinegar, yogurt is my not-so-secret-ingredient in homemade potato salad and coleslaw. For baking, I sometimes have to adjust quantities, or alter the baking time slightly when substituting with yogurt. I rarely have a problem with the end result and in fact take pleasure in knowing that I’ve actually made my cake marginally healthier.

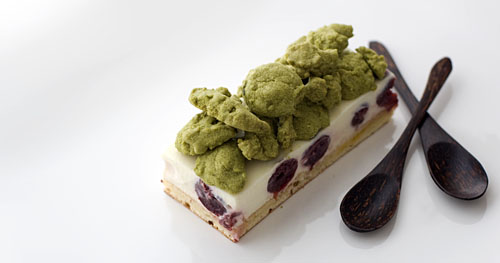
CherryYogurt-Cheesecake2

(Sour cherry and yogurt cheesecake with green tea)

The sticky ginger cake recipe (originally with sour cream) comes from Belinda Jeffery’s book. It is one of the most fantastically moist, heart-warming cakes your fork will ever meet. Belinda says it is the cake you must make, out of the entire book, and I couldn’t agree more.

The yogurt lavender cake is based on a recipe from this book and the cheesecake is from this book, which I aim to write more about soon as it is one of my current favourites. Below is the recipe for the green tea cookies which aren’t actually part of the original cheesecake recipe, but which also feature in the book and are the best green tea cookies I’ve tasted to date.

Green Tea Sable Cookies :
(makes about 50; recipe from Okashi by Keiko Ishida)

240g pastry flour (chilled)
15g green tea powder (matcha powder)
150g unsalted butter, at room temperature
130g icing sugar
pinch of salt
2 egg yolks

Sift flour and green tea powder twice. Set aside.

Beat butter, icing sugar and salt until soft and creamy. Add egg yolks and mix well. Add flour and green tea powder mixture and fold in with a spatula. Cover dough with plastic wrap and chill in the refrigerator for about 15 minutes.

Divide dough in half. Place both portions in two large pieces of parchment paper. Shape into logs about 3.5cm in diameter. Wrap logs with parchment paper and refrigerate until firm. If not using immediately, wrap with cling film and freeze. Cookie dough can be kept for up to 2 months in the freezer.

Preheat oven to 150’C. Cut logs into 7mm thick rounds. Place cookies on a baking sheet lined with parchment paper. Bake for about 25 minutes, then remove and leave to cool on wire rack before serving. Store cookies in an airtight container at room temperature for up to 10 days.

(Optional presentation : Prior to baking the cookies, you can dip the edges of each sliced cookie in granulated sugar. Also if you wish, you can brush a little egg white over each cookie and scatter with a few green tea leaves on top.)

[Note : To use as a garnish for the yogurt cheesecake above, I crumbled the sable dough on a tray before baking].

Comments (59)

Tags: , , , , , , ,

Having your cake and eating your tart too

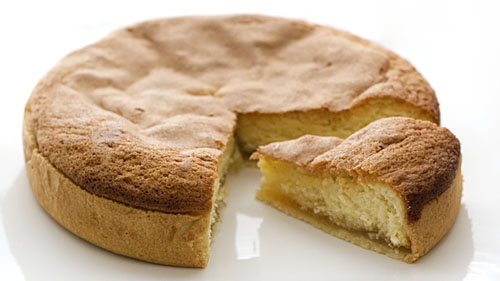
PineappleCakeTart

(Ananastaart : Pineapple Tart)

Brown food, it has to be acknowledged, is not the easiest thing to capture in enticing light. For someone who bakes, golden brown is probably one of the most attractive colours you could pull out of the oven. But for someone who also tries to take pictures of their baked goods, the same colour can be quite challenging to make look appetising.

I’ve noticed that I bake a lot of brown things, and that’s probably why I end up baking more than I blog. Let’s just say, for the majority of the time, I’d rather be eating than trying to take pictures of brown food 🙂

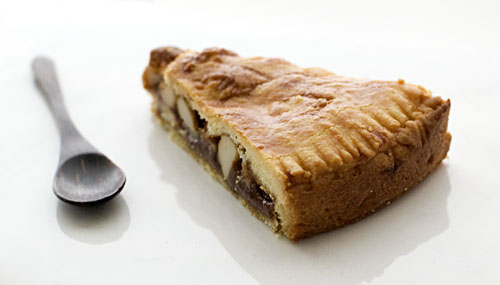
EngadineTart

(Engadiner Nusstorte : Swiss Walnut and Toffee Pie)

This Engadiner Nusstorte, made a week ago, was so delicious that I struggled to hang on to that last piece in order to take a picture. Early on in the week, I sternly pointed to the remaining slice in it’s plastic container, declaring to B that it was Strictly Photo Pie, so Hands Off. Even so, I managed to secretly (I think) shave bits off the slice until it was nearly in danger of becoming non-existent. Not long after a picture was finally taken and the pie was relegated back to Edible status, the slice disappeared.

The reason why I was so adamant about taking a picture this time was because I wanted to highlight a cookbook I bought recently, that has rapidly become one of my current favourites : Warm Bread and Honey Cake by Gaitri Pagrach-Chandra.

I love a cookbook that respects baking audiences enough to use not only cup measures, but also weight measures in grams and ounces. It also scores highly with me if it happens to feature a collection of interesting pictures, and not just ones that have been styled to the hilt. For example, check out p301 to see how kataifi pastry is traditionally made.

It also extends beyond what you’d expect from a typical baking book. There are none of the usual suspects here – no chocolate brownies or endless variations on a single cupcake recipe. Instead, Warm Bread and Honey Cake plays host to a fantastic collection of unusual recipes such as a pink-tinted Caribbean coconut roll (Salara), Chilean layered ‘drunken’ apple cake (Kuchen Borracho), Chinese steamed red bean buns, a whole chapter on Turkish sweets and savouries, and many lovely looking Dutch recipes (the author also has a book on Dutch baking called Windmills in my Oven).

Not to mention the pineapple cake tart above either. Cake and tart in one hit? What’s not to like? It was delicious, but perhaps slightly overshadowed by the power of a pie that encases nuts and toffee in a single breath. The recipe for the pie is below.

Swiss Walnut and Toffee Pie :
(Engadiner Nusstorte or Bündner Nusstorte, from Warm Bread and Honey Cake by Gaitri Pagrach-Chandra)

Pastry :
300g plain flour
1/4 teaspoon salt
150g butter, chilled and cubed
100g icing sugar
1 egg, beaten

Filling :
250g caster sugar
2 tablespoons water
2 tablespoons honey, light corn syrup or liquid glucose
150ml double (heavy) cream, warmed
250g walnuts, coarsely chopped [Note : I used macadamia nuts]

Make the pastry first. In a large bowl, mix the flour and salt. Rub in the butter until the mixture resembles fine breadcrumbs. Add the icing sugar and rub in until well incorporated. Or simply put all the ingredients in a food processor and pulse until it resembles fine breadcrumbs, then transfer to a bowl.

Reserving 2 tsp egg, add the rest to the bowl and use your fingertips to bring it together. Add a few drops of water if necessary. Cover with clingfilm and chill while you make the filling.

Have a pair of oven mitts standing by. Put the sugar, water and honey in a large heavy-based saucepan over medium heat. Stir gently to dissolve the sugar. Bring to the boil and let it continue to boil until it becomes a dark golden colour. Stir from time to time.

Put on the oven mitts and pour the warm cream into the saucepan in a steady stream, stirring continuously. It will hiss and bubble ferociously, but the mitts should protect your hands and arms. Keep on stirring the mixture on medium heat until it is creamy and slightly thickened. To test, pour 1 tsp onto a cold saucer and tilt it after a few seconds. The mixture should spread slowly and not disintegrate into rivulets. Remove the saucepan from the heat and stir in the walnuts, coating them well. Set aside to cool.

Preheat the oven to 180’C. Grease a 24cm springform tin.

To assemble the pie, the pastry should be chilled but still malleable, or it will break when you roll it. Divide the pastry into two portions, one slightly larger than the other. Roll out the larger portion between two sheets of clingfilm to a 30cm circle and use it to line the tin. (Use the bottom sheet of clingfilm to help move it, removing the sheet once the pastry is in place). Press the edges of the pastry against the side of the tin.

Scrape the filling onto the pastry. Level the top as well as you can, but don’t apply too much pressure, or you may tear the pastry and the filling will leak out. Fold the excess pastry inwards over the filling.

Roll the second piece of pastry to a neat 22cm circle. Trim if necessary. Moisten the edges of the pastry base in the tin with a little water and position the second pastry circle on top of this. Use a fork to crimp and seal the edges. Brush with the reserved egg and prick with a fork in several places. If you like, you can score a plaid pattern onto the surface with the fork.

Bake for 35-40 mins, or until golden brown. Leave to cool until lukewarm in the tin, then loosen the sides, release the clip and carefully transfer the pie to a wire rack to cool completely.

Comments (72)

Tags: , , , , ,

« Previous Page · Next Page »