I made this! Pt. 4

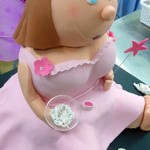
Isn’t she pretty? I didn’t want to name her, but I must admit, I still felt a bit of a pang when I handed her over to Jillian, who met me at the end of the class to adopt my cake. After you spend two straight days moulding her, dressing her, fixing flowers in her hair and adjusting her cakey boobs, you kind of get attached to this mass of mud cake and fondant.

She is a Naughty Fairy cake, which I learnt how to make in Planet Cake’s Basics 104 class. I’ve attended a few of their other classes before, but I specifically signed up for this class (which was spread out over two days) because I’d never made a 3D cake before, and figured, once you knew the basics, you could apply this skill to any other type of 3D cake. Not to mention the fact that it’s so much fun and you get to meet and ‘talk cake’ with a whole bunch of other like-minded people. Lorinda, for example, who makes the most gorgeous looking cakes (and she has won prizes for them too!). You might want to consider her if you ever need a cake in the future.

The other great thing about this class, apart from the fact that the instructor Handi Mulyana made everything look so easy, was that you could go nuts and customise your fairy as much as you wanted; from skin colour and hair colour, to the style of dress and accessories – as can be seen from the group shot of all the fairy cakes (or the graduating class of 104, as I like to call it). Note the ciggie in the demo fairy cake’s mouth on the far right, and the one of the far left, made by Linda, which has a touch of the Dolly Partons about her (the cake that is, not Linda!).

Jillian sent me an email this morning to let me know that the Fairy cake was very much appreciated at her dinner party. So she wasn’t just a naughty fairy, but a very happy one as well!

Planet Cake
106 Beattie Street
Balmain 2041.

Comments (9)

The Good Biscuit : Linzer Thumbprint Cookies

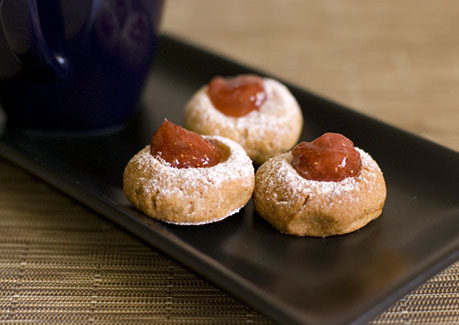
From Sherry Yard’s latest cookbook, comes this gorgeous nutty, spiced biscuit dough which can be used as a tart shell, or formed into cute thumbprint cookies. For a little hint of something extra, I substituted the normal honey with Tasmanian leatherwood honey. I still have half the dough which I’m keeping well wrapped in the freezer, for a rainy day when nothing but a quick, homely biscuit will do.

The following is just the recipe for the basic dough. I’m sure you know what comes next, if you’re planning on making thumbprint cookies – pinch off little portions of dough, roll into balls, indent with your thumb and bake until golden. Cool, then fill with a jam of your choice. Here, I have opted for a homemade strawberry jam by Christine Ferber.

Linzer Dough :
(from Desserts by the Yard, by Sherry Yard)

1 cup plain flour
1 cup cake flour
1/4 teaspoon salt
170g hazelnuts, toasted, skinned and ground
226g unsalted butter, cut into 1/2-inch pieces, softened
1/2 cup sugar
1 teaspoon ground cinnamon, preferably Vietnamese [I used normal ground cinnamon]
1 teaspoon Chinese five-spice powder
1 tablespoon honey
1 large egg
1 tablespoon grated orange zest

Sift together the plain flour, cake flour and salt. Stir in the ground hazelnuts and set aside.

In the bowl of a stand mixer fitted with the paddle attachment, cream the butter on medium speed until lemony yellow, about 2 minutes. Scrape down the sides of the bowl. Add the sugar, cinnamon, and five-spice powder and continue creaming the mixture on medium speed until it is smooth and lump-free, about 1 minute. Stop the mixer and scrape down the sides of the bowl and the paddle.

Add the honey, egg and orange zest and beat on low speed for 15 minutes, or until they are fully incorporated. Do not overbeat. Scrape down the sides of the bowl and the paddle. On low speed, add the flour and hazelnut mixture. Beat slowly until the dough comes together. Scrape down the sides of the bowl, then mix for 15 seconds, until an even-textured dough is formed.

Remove the dough from the bowl. Divide into 2 equal pieces. Wrap in plastic wrap, pressing the dough into a square, and refrigerate for 30 minutes or up to 2 days.

Comments (3)

Fennel Taralli

For this week’s WHB, hosted by Gay of A Scientist in the Kitchen, I am baking with the seeds from a lovely herb, fennel. I love the fennel bulb for it’s sweet, aniseed-y flavour, and it’s crispness when shaved finely into salads. Their seeds (the dried fruit of the plant) are as strongly flavoured and have many uses in the cuisines of various cultures.

Ground fennel seeds are an essential ingredient in Chinese Five Spice powder; the “wonder powder” of Chinese cooking. I have also seen a sweet version of these seeds sold in Indian grocery stores. Each seed is individually coated in a colourful sugar shell and these are generally eaten after a meal to sweeten the mouth, freshen the breath and aid digestion (by helping to expel gas!).

It is also a commonly used ingredient in Italian cooking, and are what make these Fennel Taralli so special. The recipe, which features in Maggie Glezer’s Artisan Baking book, comes from a bakery in Brooklyn, New York, run by two Italian Bakers. These rubberband-shaped breadsticks emerge from the oven, aromatic and glossy. They are meant to keep ‘indefinitely’, but I can’t really vouch for that because they didn’t last more than a couple of days in our house!

Fennel Taralli :
(from Artisan Baking, by Maggie Glezer)

1/2 teaspoon active dry yeast
250g water, at about 43’C
450g plain flour
120g durum flour
1 3/4 teaspoon salt
40g vegetable oil
60g white wine
10g fennel seeds
2 tablespoons olive oil

In a small pitcher, sprinkle the yeast over the warm water, stir, and let stand for 5 to 10 minutes.

Combine the plain flour, durum flour, and salt in a large bowl. Add the vegetable oil, white wine, and yeasted water. Mix the dough together, then knead this incredibly stiff dough until it smooths out a little. Knead in the fennel seeds.

Immediately after mixing, cut the dough into 32 pieces, each weighing about 30g. Place a cup of water next to you to help you roll. Dampen your hands with just a few drops of water and roll a piece of dough into a rope about the thickness of a pen. It should be about 11 inches long. Pinch the ends together hard. Hold the rope ring together at the seal and let it drop into an elongated oval shape. Place it on a tray or on your work surface. The seal should be at the top curve. Continue to roll and shape the rest of the taralli.

Cover the taralli with plastic wrap and let them rest for 2 hours. They will not appear to rise at all.

Arrange 2 racks on the oven’s center shelves and clear away all racks above the ones being used. Preheat the oven to 205’C.

Fill a wide pot 3/4 full of water, bring it to a boil, and then lower the heat so that the water simmers. Add the olive oil to the simmering water. Set a cooling rack over a baking sheet and place it near the water. Line 2 large baking sheets with baking paper.

Boil the taralli in batches small enough to fit comfortably in the pot. They will sink at first then quickly float. (If they do not float, let them continue to rest for another hour, then boil them.) After they float and puff up a bit, after about a minute of boiling, skim them from the pot and let them drain on the cooling rack. Boil the remaining taralli. After each batch has drained, move them to the paper-lined baking sheets.

When you have finished boiling the taralli, bake them until they are golden brown and very dry, about 45 minutes, rotating the baking sheets halfway into the bake. Let them cool on a rack and store them in a sealed container.

Comments (4)

« Previous Page · Next Page »